This post contains affiliate links. To learn more, hop over to our Disclosure page.
We all want our manicures to last as long as possible, right? Today I’m sharing my absolute favorite nail hack using at-home gel polish!
How do I keep my manicure beautiful for longer? I can’t count how many times I’ve looked down at my nails to see my miniature masterpieces chipping away like tiny little landslides. It infuriated me how I would put so much work into the upkeep of my nails only for it to slip away as soon as I used my hands for anything besides a princess wave.
Well, that is no more! With this hack, you’ll have beautiful nails for 2-3 times longer than if you used polish alone. The best part is you can still use all of your favorite polishes. No more chasing down the latest and greatest “long lasting” polish anymore.
To learn more about this awesome technique, keep reading!
The frustrations of the perpetually chipping manicure
Life doesn’t stop because you want to keep your nail polish pristine. I had a job in retail where I routinely used my nails as tools to pry open shipping cartons. I also had a job where I yanked on over 100 pairs of gloves per day. As I fell into a frustrating spiral of painting, working, chipping, screaming, and painting again, I purchased more expensive polishes because they were supposedly “better quality.” Perhaps this is true, but those pricy polishes did not solve my problem.
The polish you use doesn’t matter (nor does the price)
The technique I have been using to make my manicures last up to three times longer has nothing to do with the price of the polish. I use this technique with salon brand polishes and polishes that cost $0.99 at Walgreens, and I’ve seen almost no difference.
Of course, the activities that you put your hands through will have an effect on how long your manicure lasts. This is why I say the manicure can last up to 3x longer rather than a static timeframe such as 2 weeks. For example, when I worked in a retail store opening boxes, my manicure would often not even make it unscathed through one, seven hour shift. However, when I used this technique, my manicure could last through three shifts, which was amazing to me considering my track record.

The problem with “proper” gel polish manicures
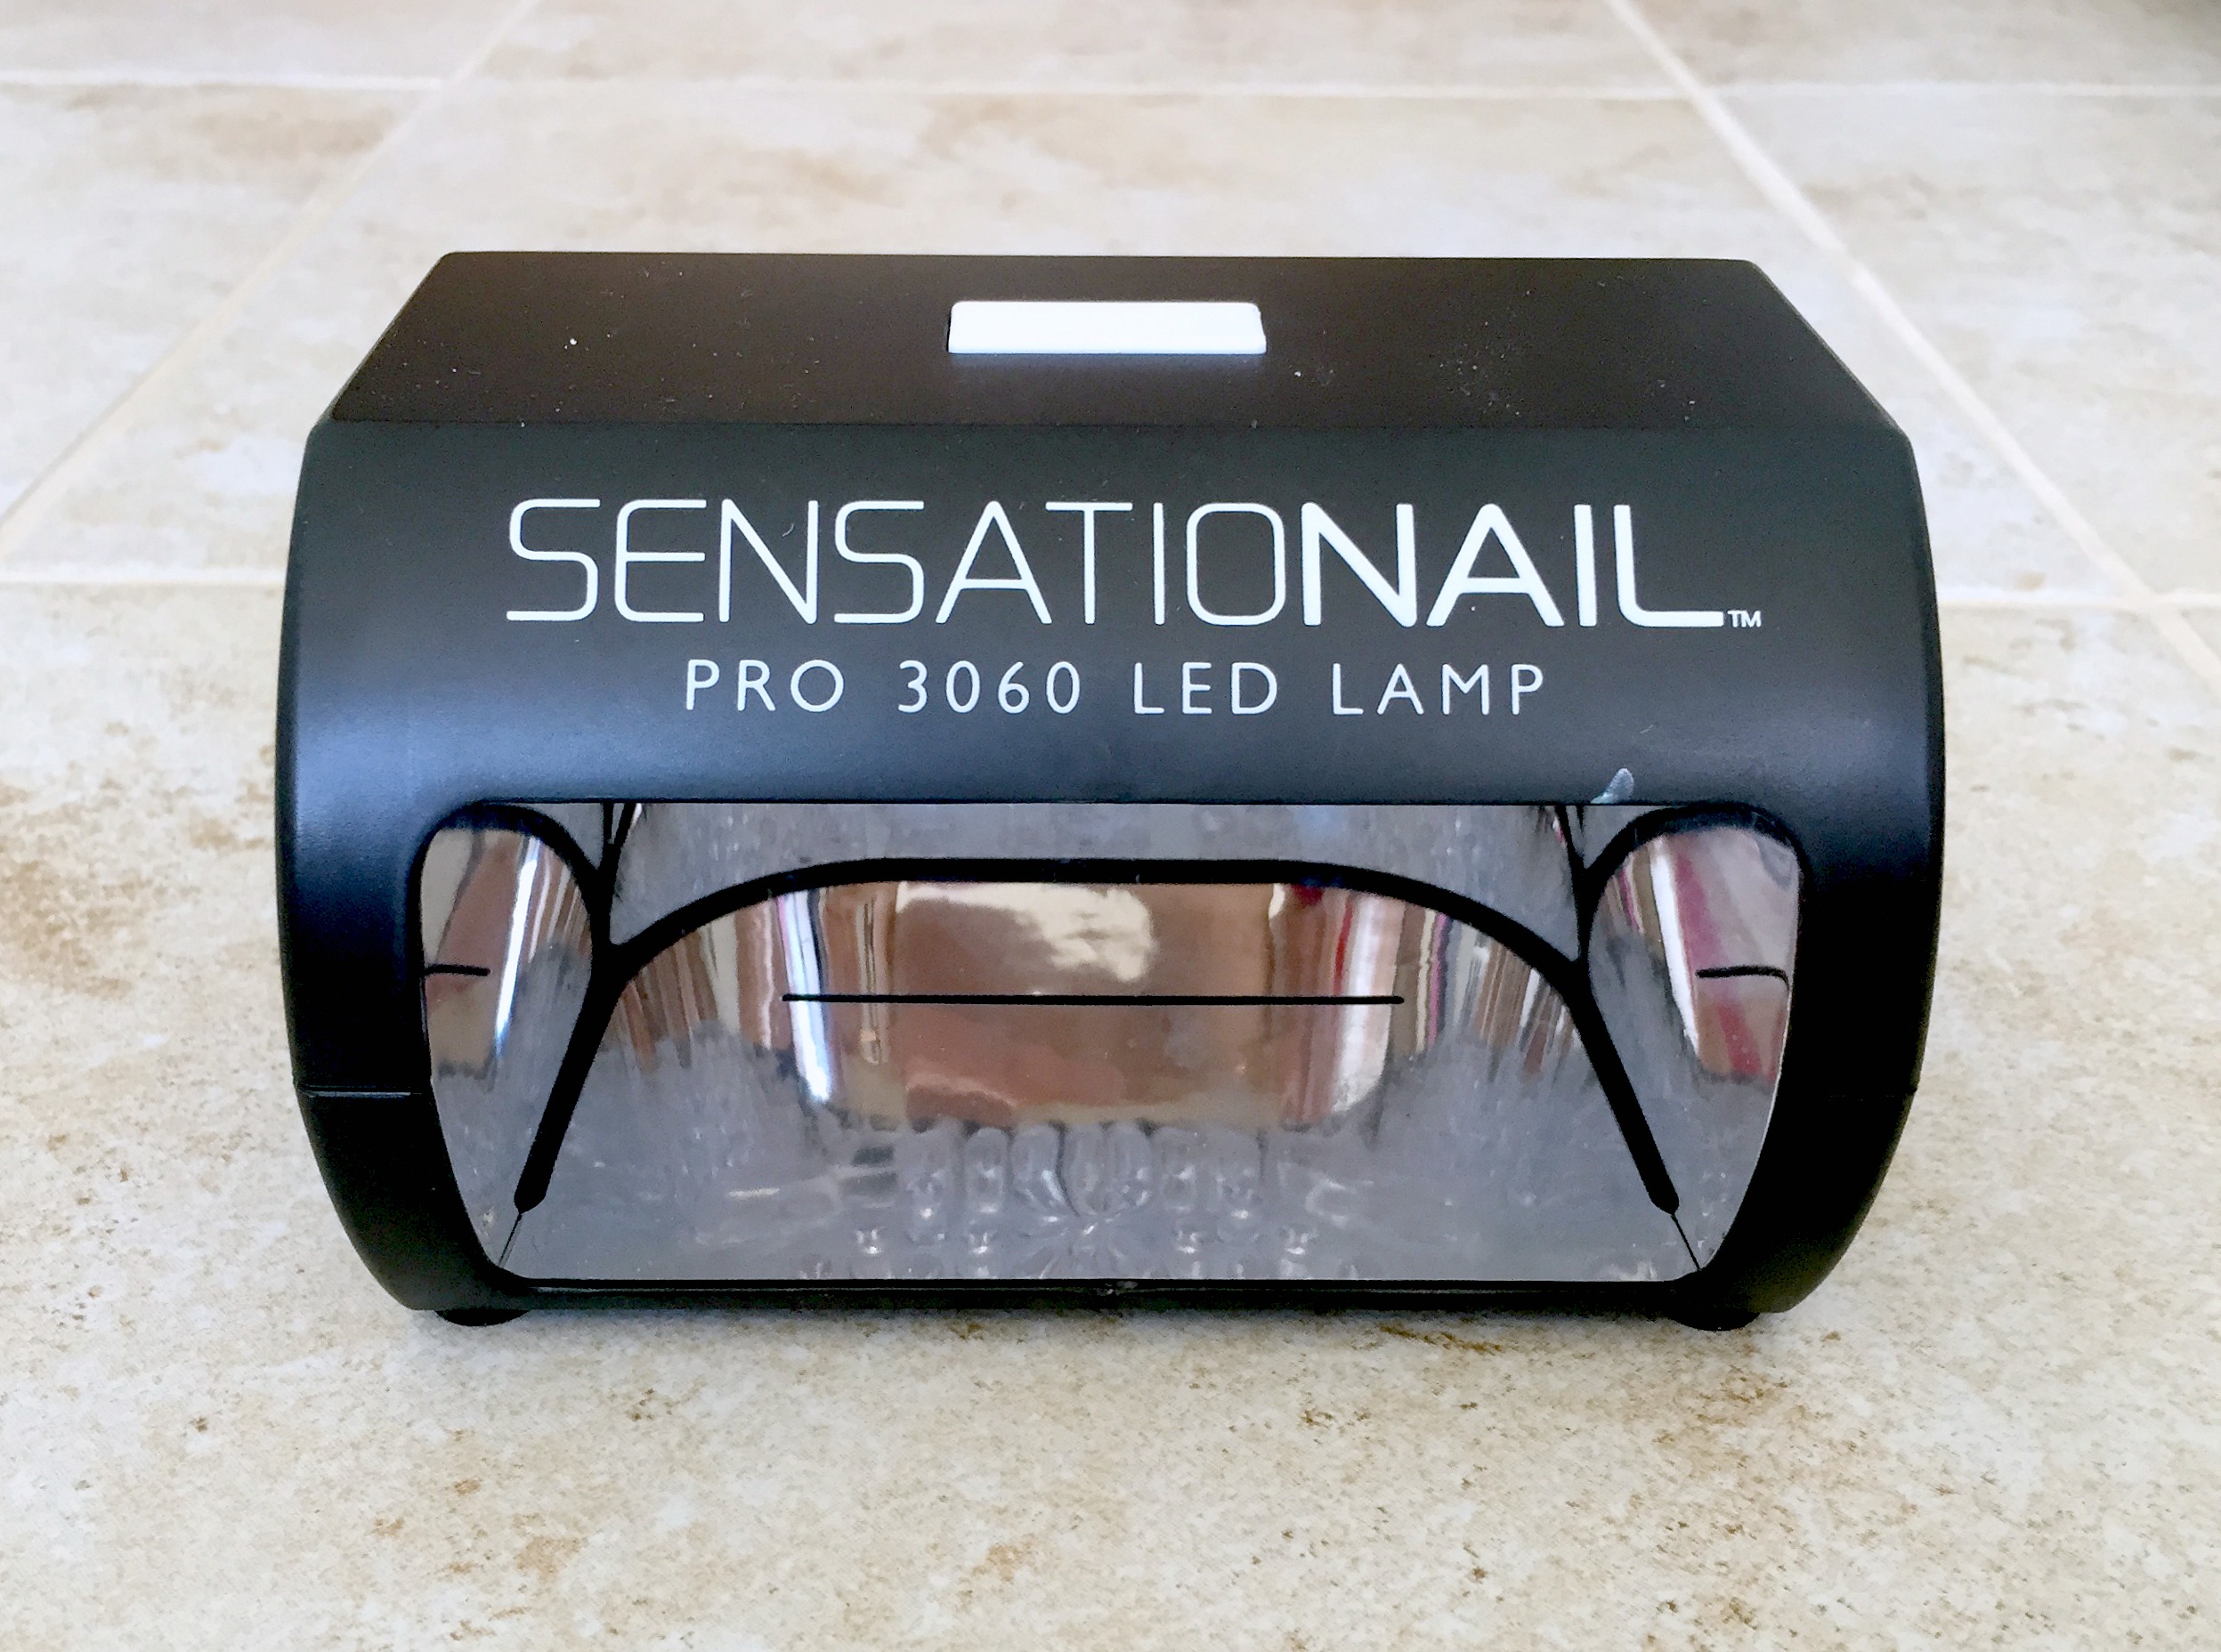
Now I’m sure we all know the benefits of gel polish, right? Right. It lasts forever on your nails, it doesn’t peel, chip, crack, or fade. For a short time, gel polish became my product of choice in order to keep my nails looking presentable. Specifically, I used an at-home gel manicure kit called Sensationail.
Sensationail works very well and my new at-home gels lasted about two weeks. But being the indecisive person that I am, the thought of committing to a single manicure color for two whole weeks gave me anxiety. Plus, if you have ever had to remove gel polish, you know how un-fun the whole endeavor is.
Sensationail Starter Kit >> Purchase on Amazon
I wanted the longevity of the gel polish, but the flexibility of regular polish, so I did both.
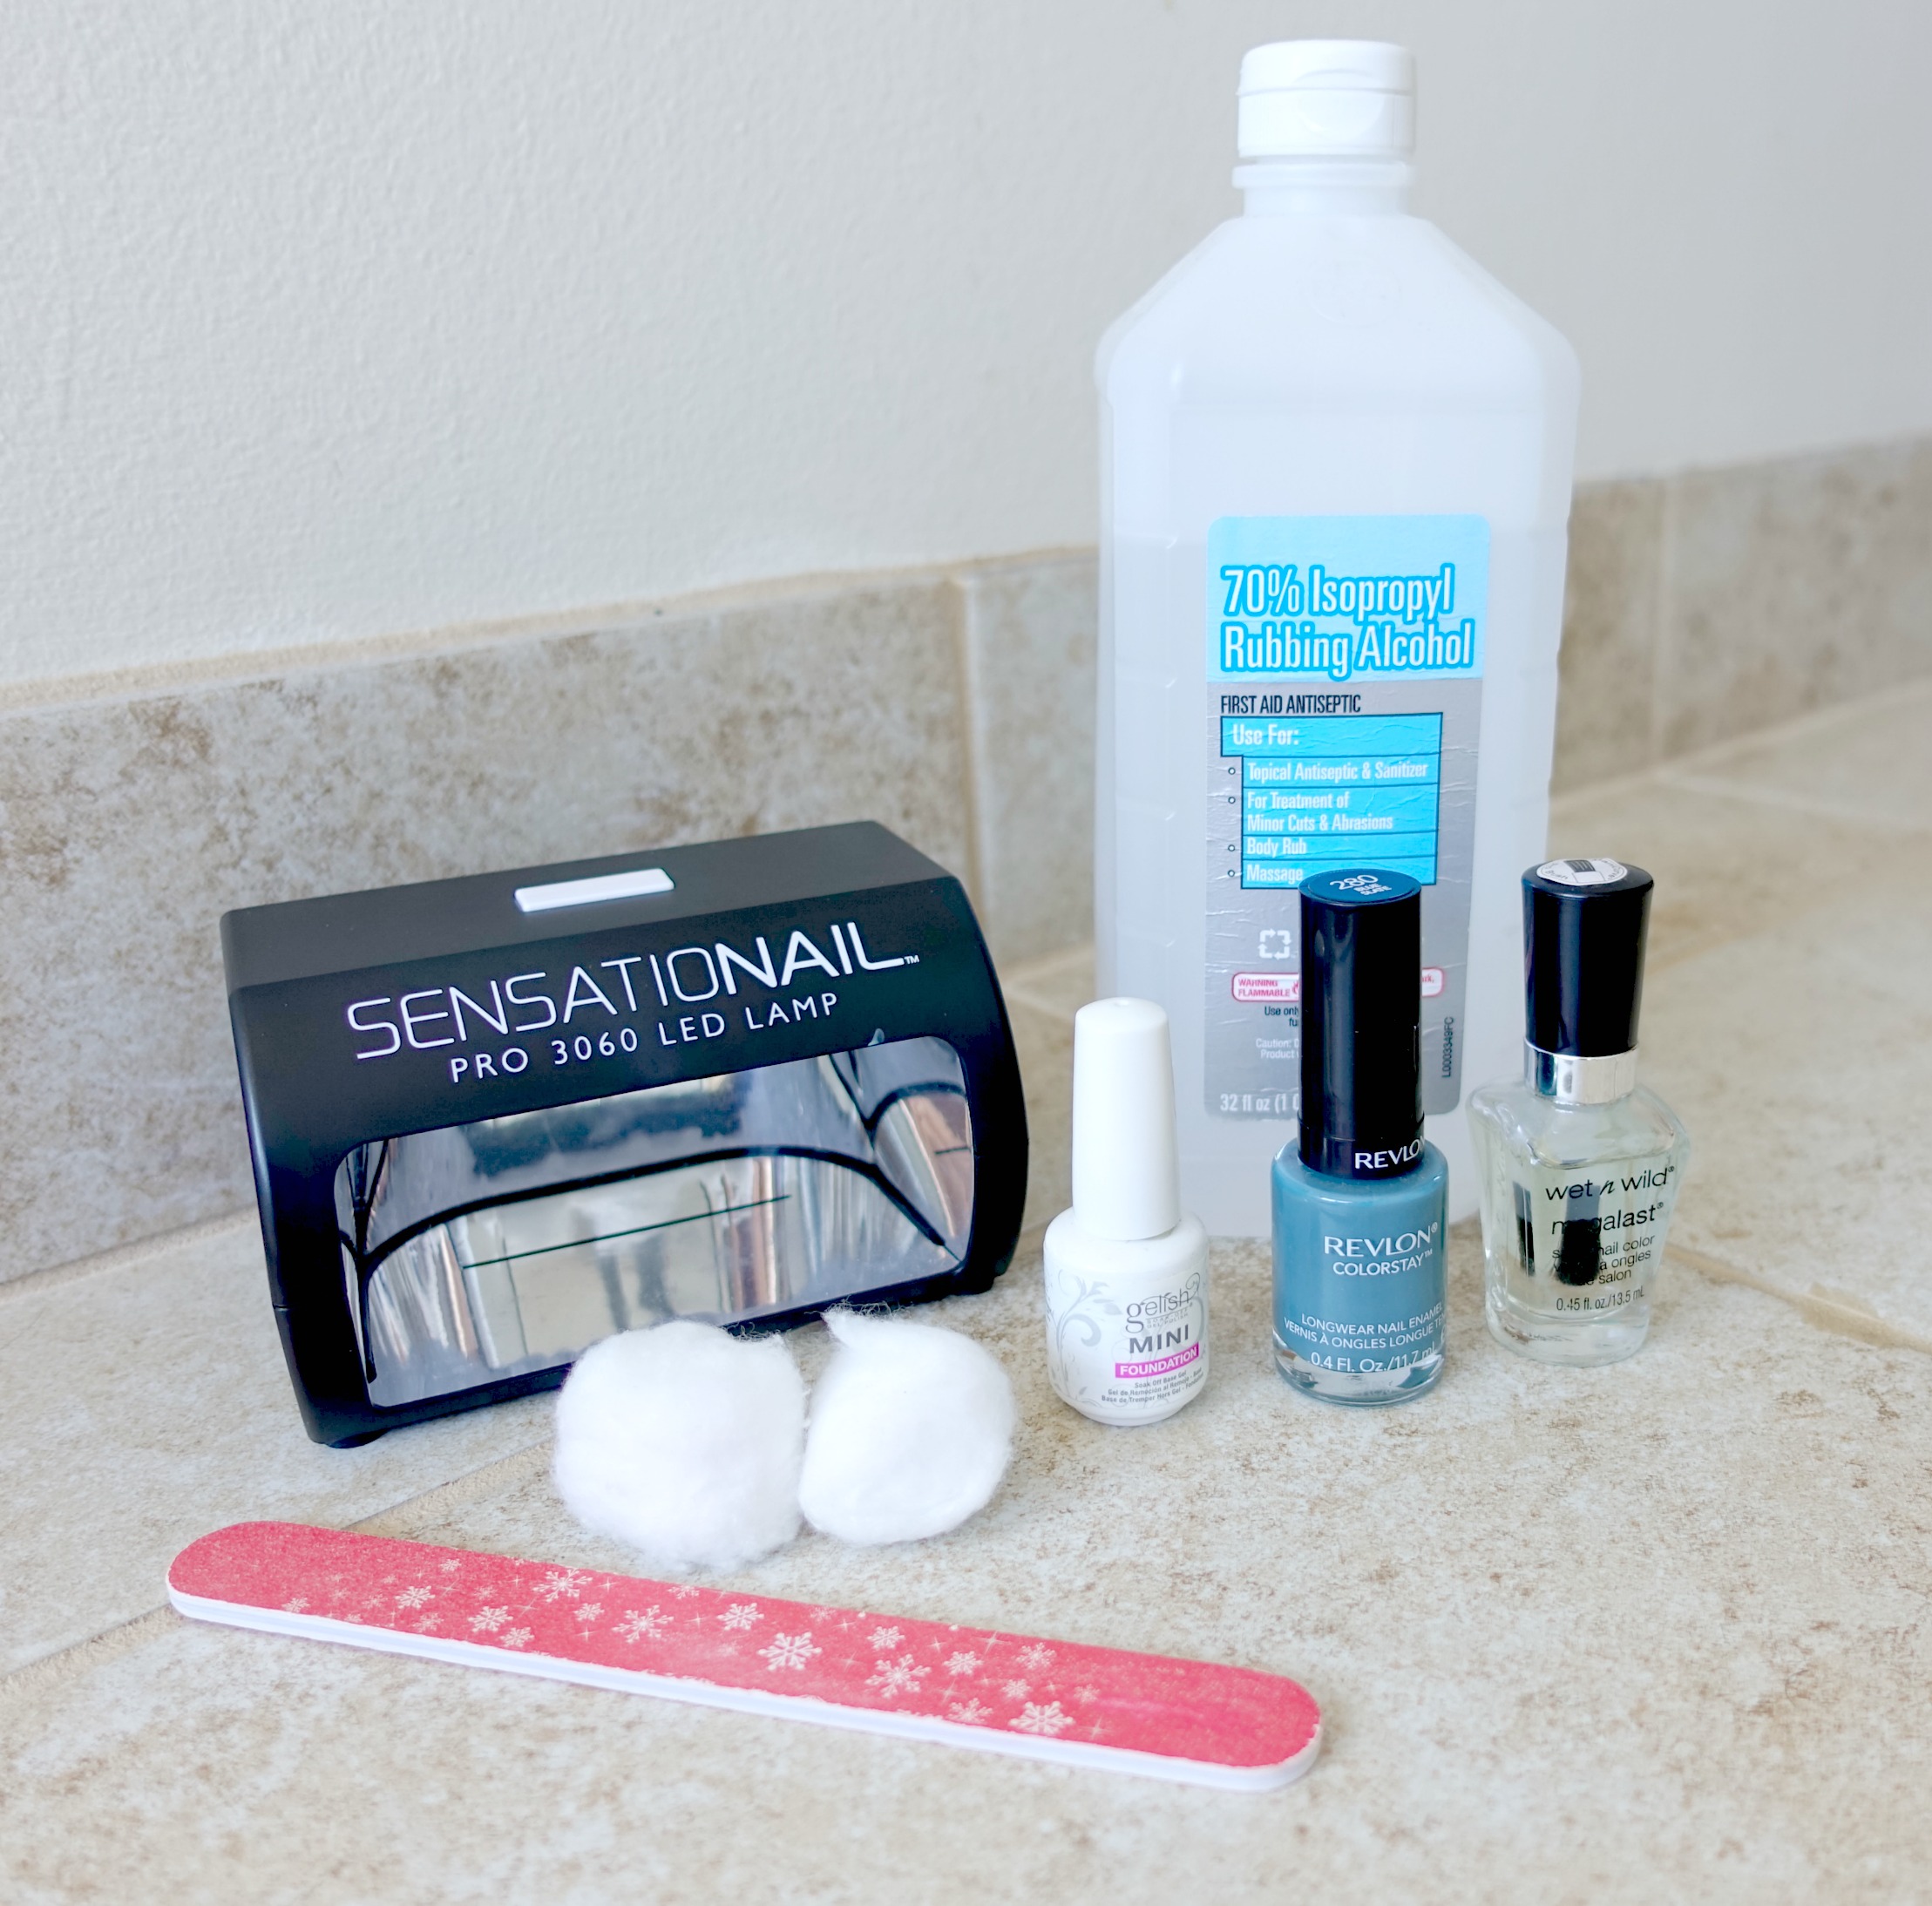
What you’ll need
◦ Nail polish color of your choice
◦ Top coat of your choice
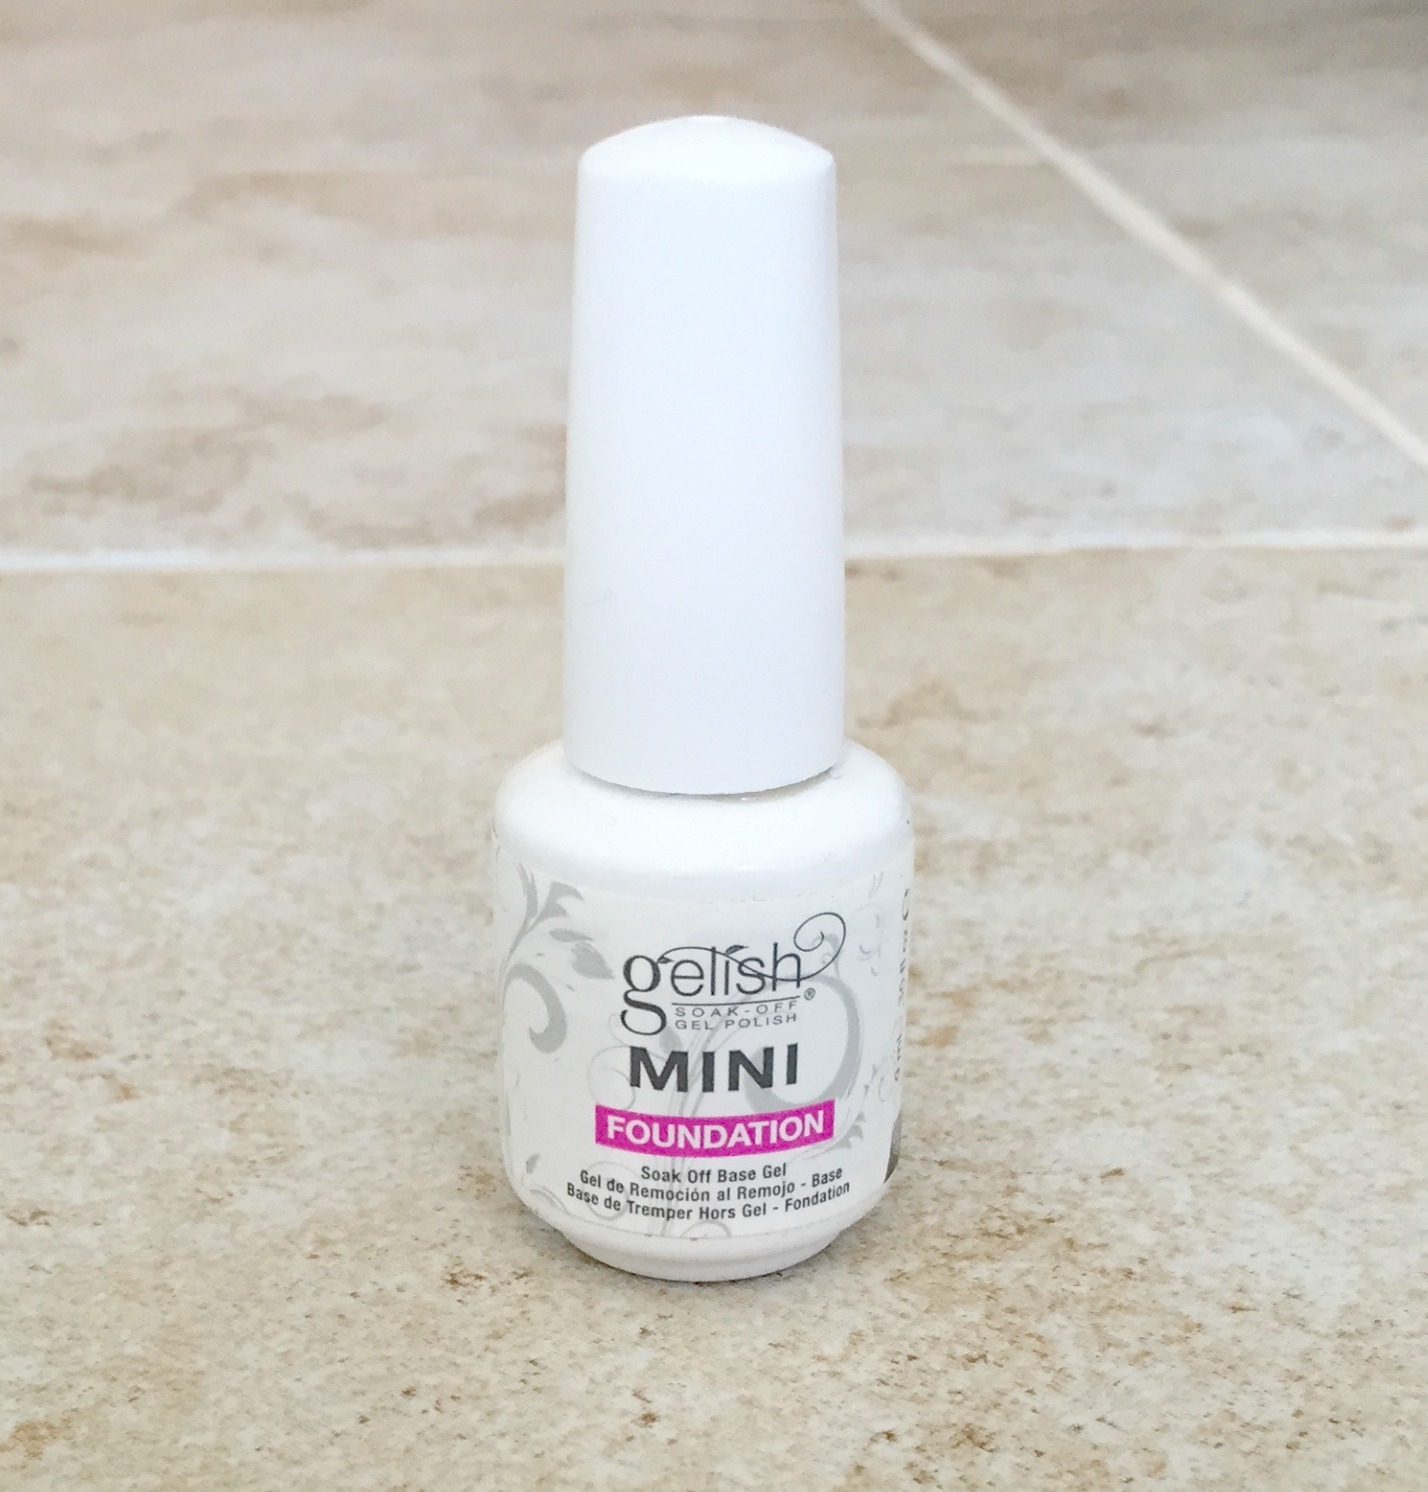
◦ Clear base gel (I prefer the Gelish Foundation Base Gel)
◦ LED curing light
◦ Rubbing alcohol
◦ Cotton balls (or rounds)
◦ Nail buffer
How to do it
Using the nail buffer, gently scuff the surface of your nail. This will help the gel to adhere to your nail more effectively. Do go nuts here- just a light scuff will work fine.
Wash your hands to clean off any oil or debris from your nail. Dry your hands with a lint-free towel and then let your hands air dry for an additional 10 minutes to ensure your nails are completely dry.
Apply one coat of the clear base gel and cure under the LED light for 30 seconds. Make sure you spread the gel evenly across your entire nail from cuticle to tip, and run the brush across the edge of your nail to protect the edge.
Tip: It is best to do this is sections, as not all to nails can fit under the lamp at once. I recommend doing your thumbs first, curing them both at the same time. Then, paint the gel onto the remaining fingers on one hand, and cure. Then move on to the next hand.
After curing, there will be a sticky film left on your nails. This is normal, and does not mean the gel polish didn’t set. Moisten a cotton ball with rubbing alcohol and wipe across your nails to remove the film. This takes just about as much pressure as removing regular nail polish.
Now, simply paint your favorite nail polish color over the top of the gel polish. Add additional coats as necessary, though you should find that your polish goes on smoother and more evenly. Seal with your favorite top coat.
That’s it! Enjoy your new long-lasting manicure.
Some other handy benefits
In addition to making your polish last longer, applying polish on top of the gel significantly reduces the drying time. If you are impatient like me, (or even if you’re not,) this is a fantastic.
When you want to change your polish, simply remove the color with regular nail polish remover. Without soaking, the clear gel polish will be left behind on your nail. Should you want to remove the gel, simply follow the gel-removal procedures outlined on the bottle, though it should be much easier since the gel layer is much thinner than it would typically be.
To keep my manicures going, I often reuse the gel layer. After removing the polish, I will clean any leftover color and/or rough edges from the gel by going over it with my nail buffer. Then I will simply paint another layer of gel over the top, cure it, and paint as usual. I find that this works well because the nail constant growth prevents the gel layer from getting too thick.
I don’t recommend doing this indefinitely, but I can get a good six week cycle out of it. After that, remove all the gel and start fresh.
I hope this technique help you obtain the beautiful, lasting manicure that you desire.
That’s all for today!
If you liked this post, check out this one –> How to Apply Winged Liner the Quick & Easy Way.
If you found this post interesting, informative, or just plain entertaining, let me know in the comments below. And remember, sharing is caring. Share this post!
Till next time. ♥︎
Sign up for my free monthly e-journal, The Millennial Maven Love Letters for exclusive content + millennial inspiration and lifestyle hacks. Plus get instant access to my library of on-the-go style downloads!
Disclaimer: This method stems from my personal experience using at-home gel manicure kits. While I hope that this helps you, I cannot express any guarantees that this method will be right for you.
FTC- This post is not sponsored by any of the brands mentioned. I purchase all product myself. All opinions are my own. Some links may be affiliated.
This is an interesting idea! And it makes nail polish last longer than normal? Do you have any problems when you need to remove the polish and change color? Thanks!
-Jona
Hi Jona! This actually does make my nail polish last longer- just the normal stuff, not “fancy” nail polish by any means. I could be wrong, but I think it has to do with the smooth and clean surface the gel provides that helps the polish adhere and not flake.
When I want to change color, I simply use a nail polish remover to swipe off the color. For the most part, the gel will stay put, ready to be painted over again! You can always add a fresh layer to keep it going, and then “reset” you nails by removing all the gel every 3-4 manicures. Keep in mind sometimes the polish will stain the gel, so that’s really the only problem I have. You can choose to paint over it (if you’re doing a dark color) or remove the gel and start over.
Hope this helps, and thanks for reading! 🙂 xo
I’ve got to try this!
Thx Kay:)
I’d love to hear how it goes!