This post contains affiliate links. To learn more, hop over to our Disclosure page.
You want to look your best at all times. I get that; I do too.
Unfortunately, there are only 24 hours in a day, and as much as I love beauty, I have other things I want to do as well. I have a weekend trip coming up soon where I will be away from home, (and hence, the makeup collection,) for a short while.
We will be going out to dinner, socializing, taking pictures, etc., so of course I want to look nice. However, since the trip is barely 48 hours long, it would be ridiculous for me to carry too much makeup, because really, I only have one face… which will probably be in the pool more often than not.
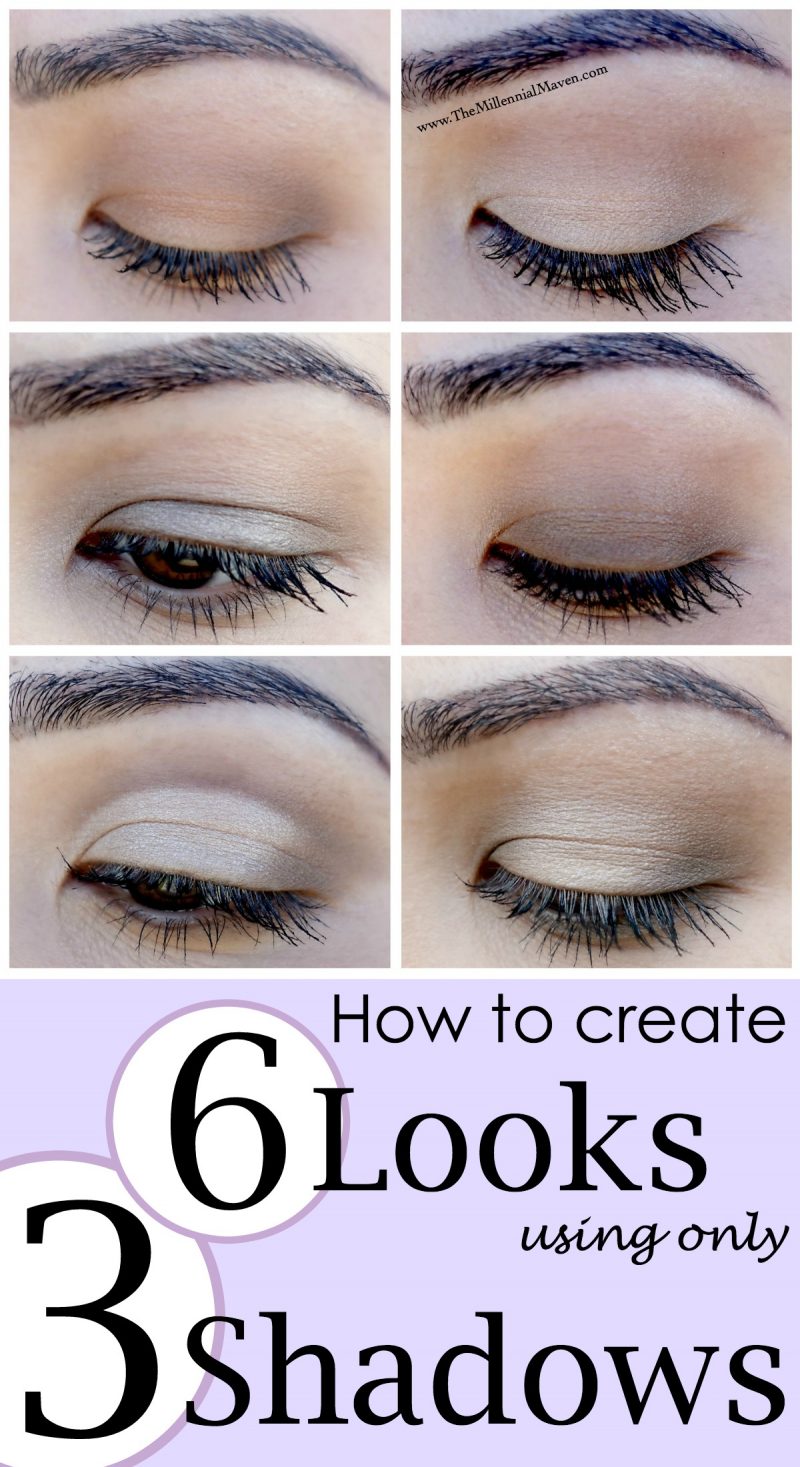
This got me to thinking about how I could challenge myself to come up with as many different looks as possible using only the most basic of eyeshadows. Then, I would put them all together as a sort of “cheatsheet.” If I was ever feeling uninspired or frustrated with the idea of wearing the same colors multiple times in a row, I could take a peek at my cheatsheet and use it to help me create a look that is not the equivalent of wearing the same t-shirt two days in a row. I know all you makeup lovers out there know what I mean. 😉
Keep reading to see how I created these six unique eye looks using three of the most basic shades in the eyeshadow universe!
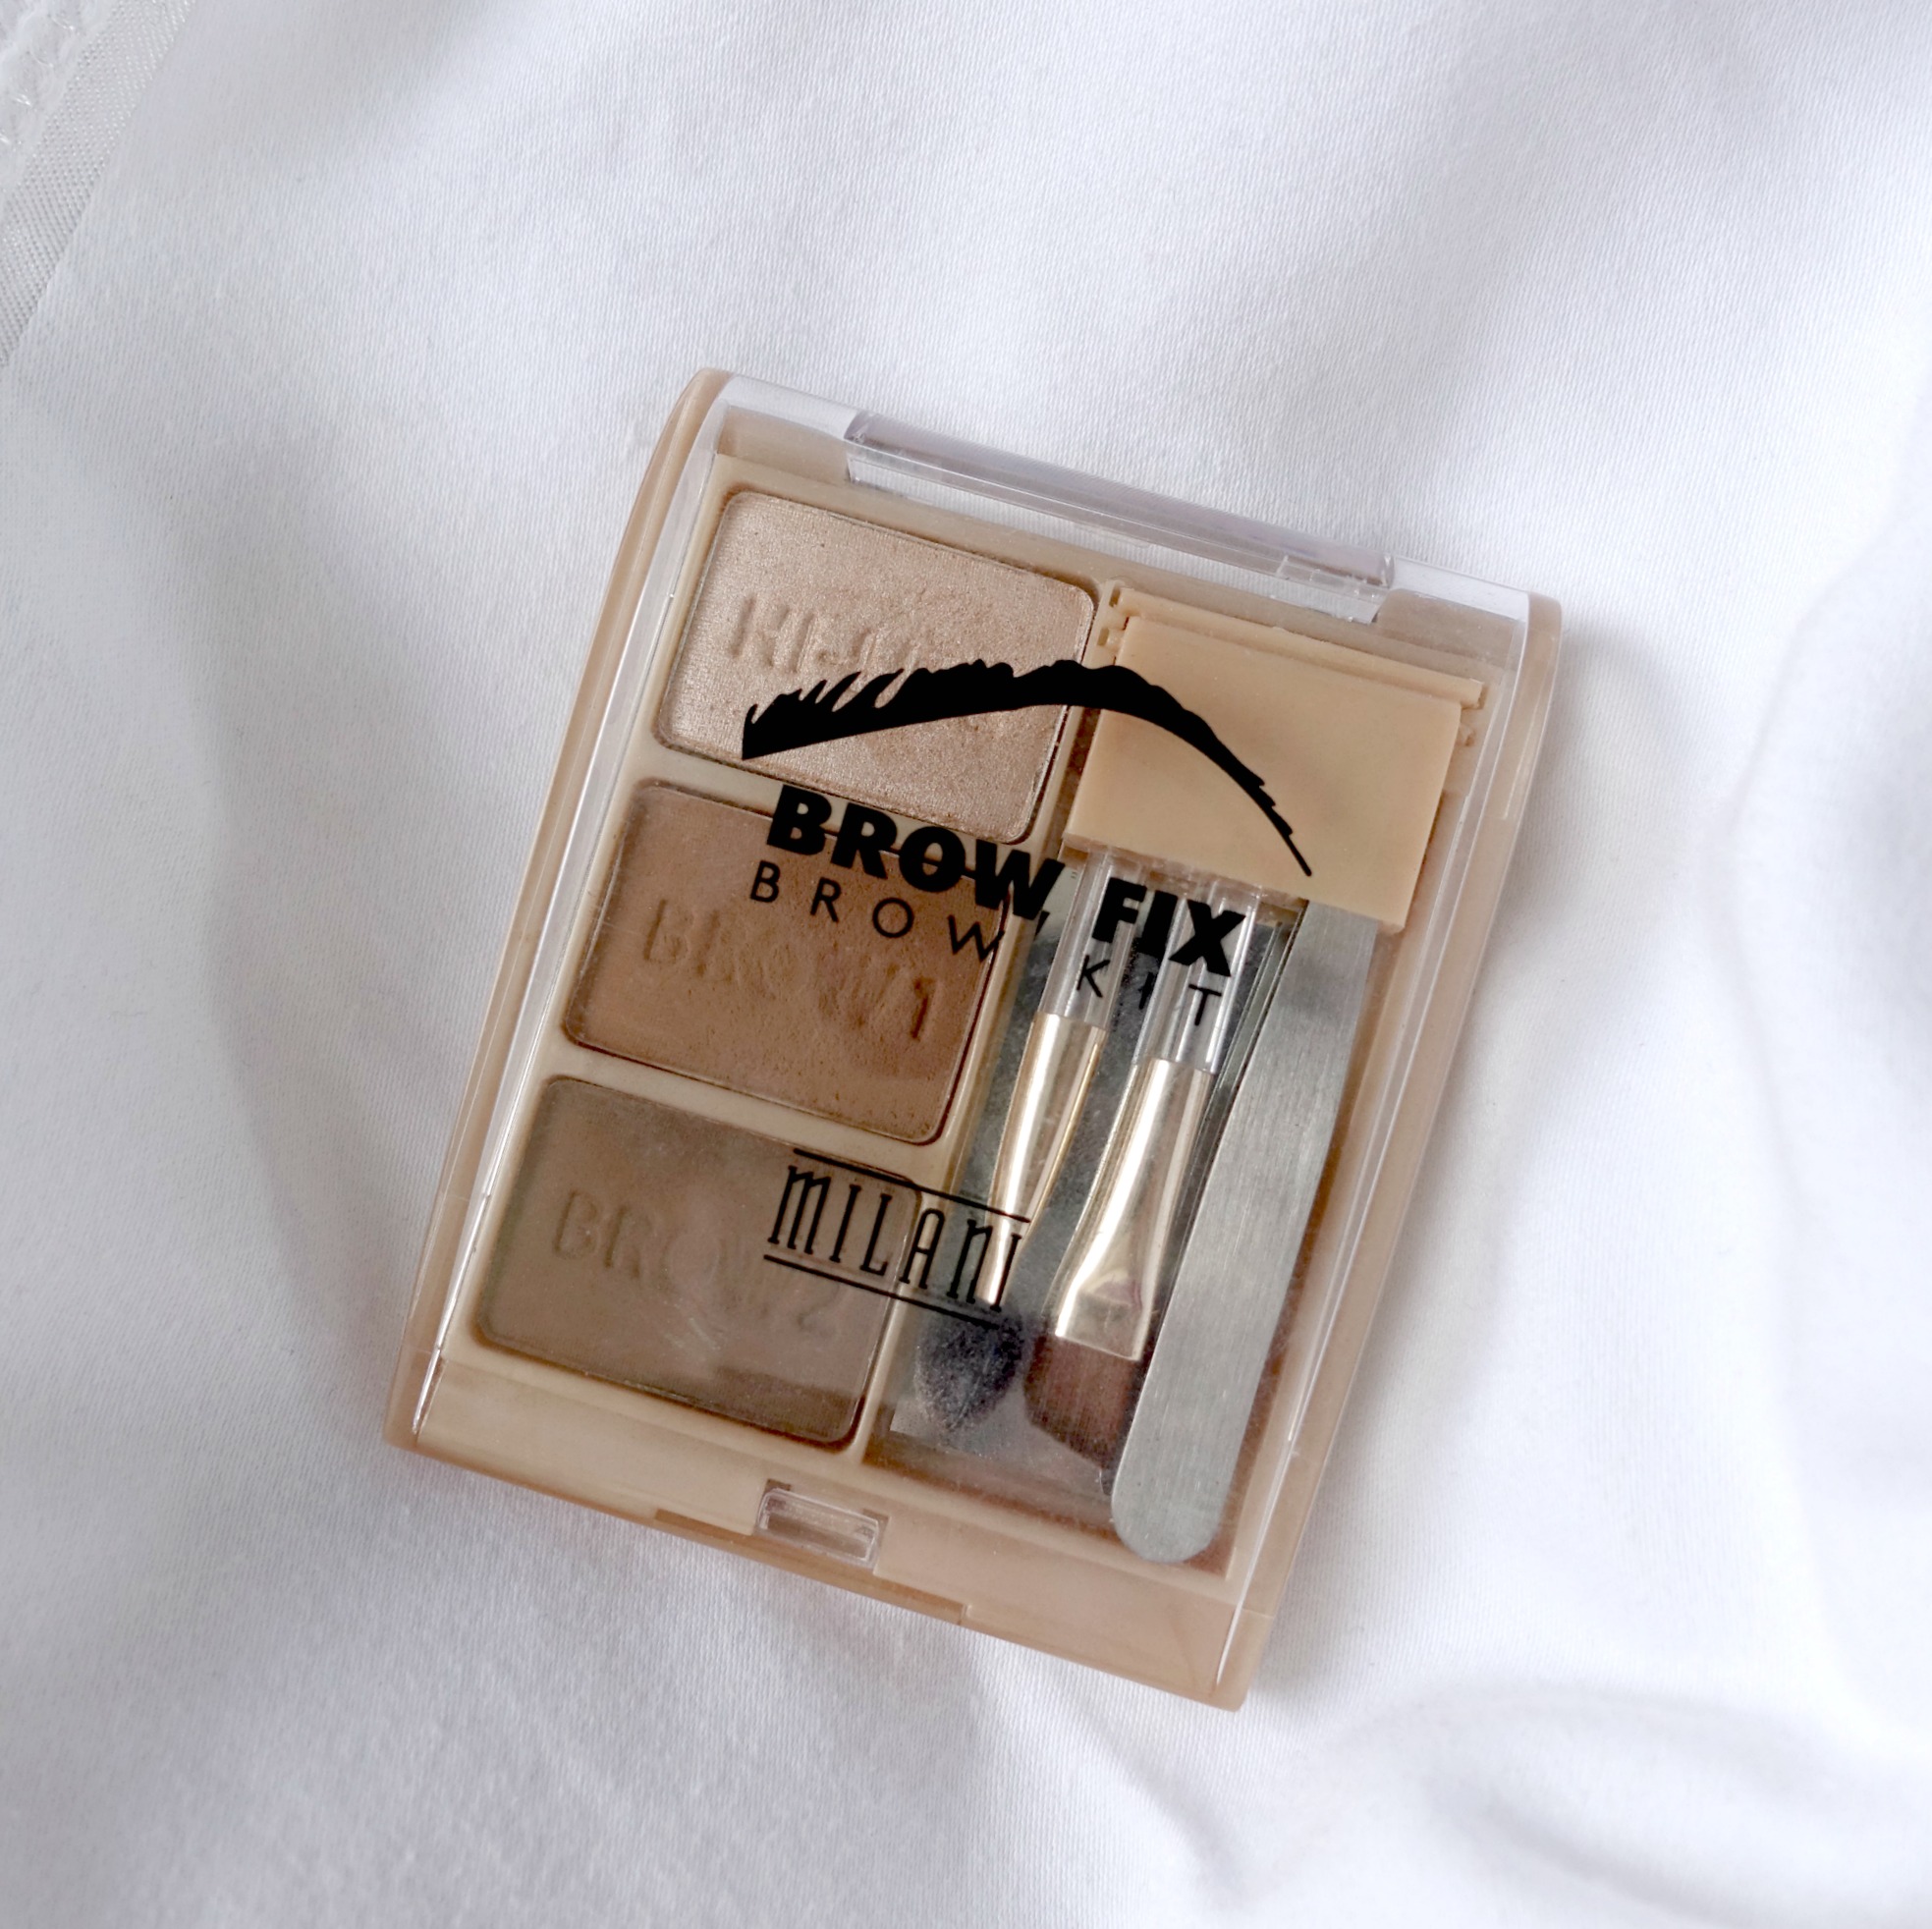
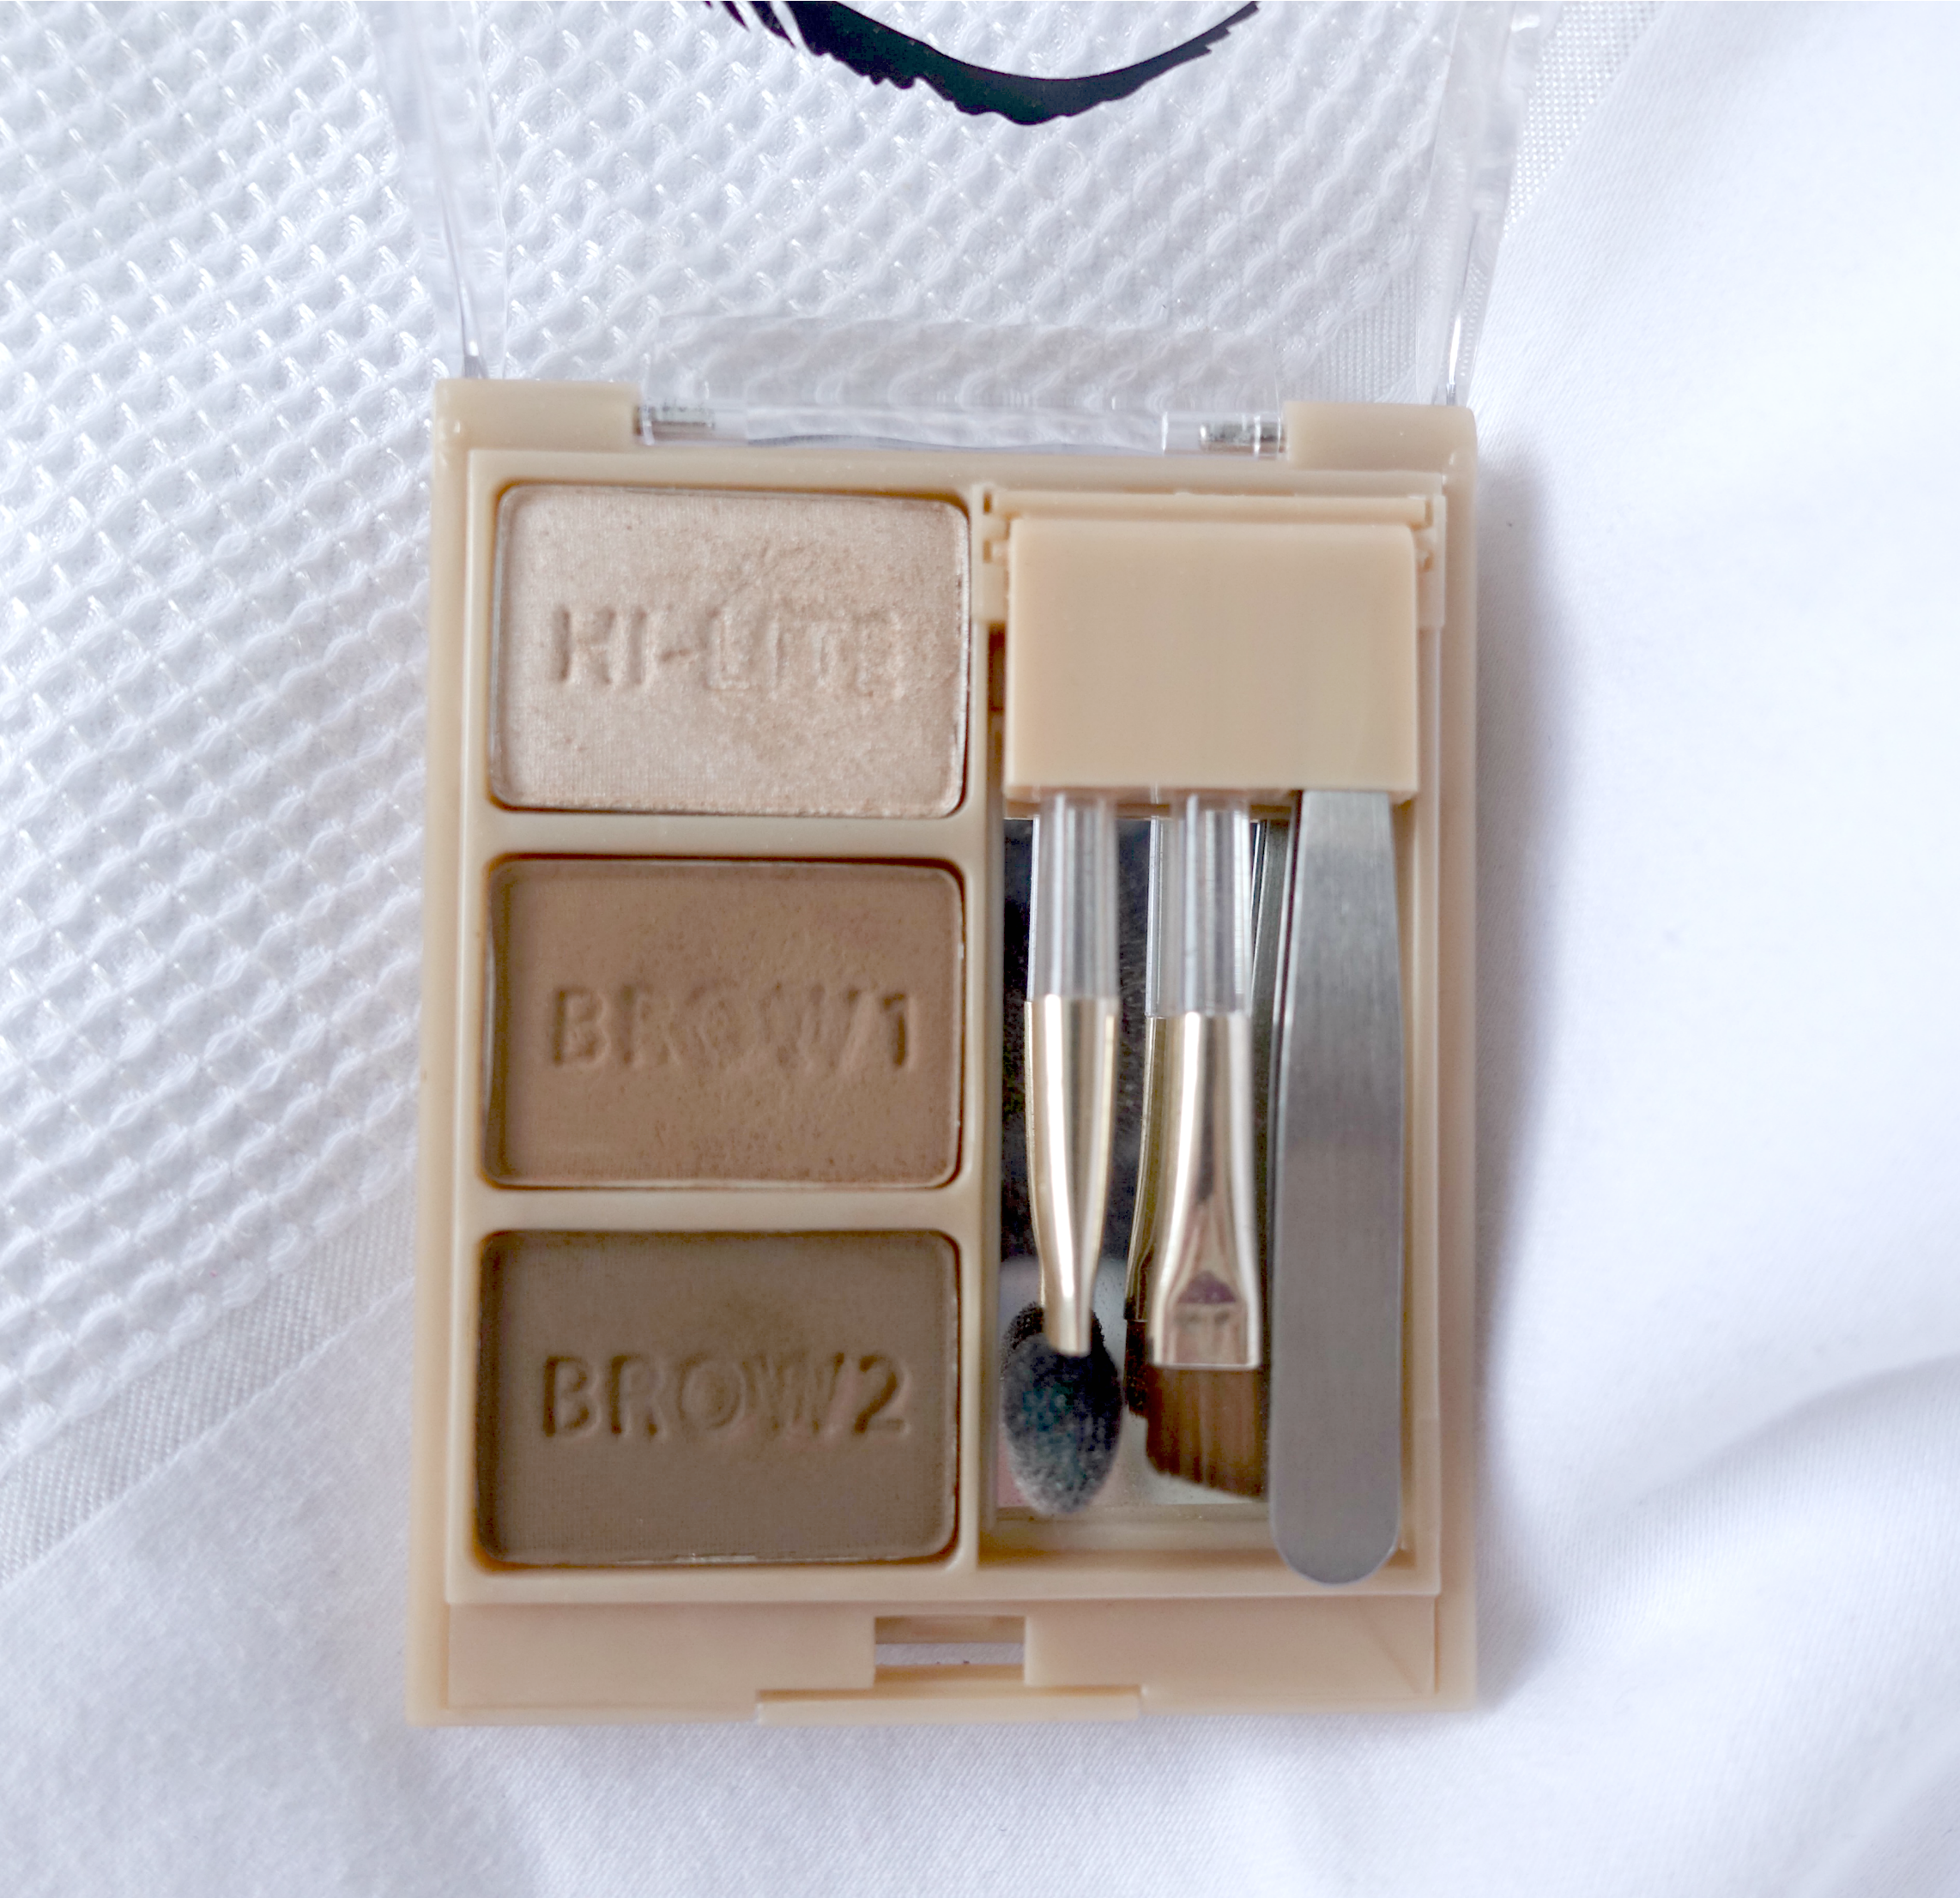
The eyeshadow trio — Milani Brow Fix Kit in Medium
To make things even simpler, today we aren’t even using real eyeshadows! This may seem weird, but when I am trying to really save space and cut down on the items I am lugging with me, I tend to get rather inventive with my product usages. I find this works well for me, (not to mention the kit includes the little applicators and tweezers, super convenient!)
You can use any shadows that you have in your collection. I recommend finding something like this, where you have all three shades together in a small palette, or even purchasing single shadows and placing them in a small Z Palette.
Singles from brands like MakeupGeek and MAC make great choices. This way, everything is compact for when you travel, and all in one place when you’re at home and in a hurry to get out the door.
Milani Brow Fix Kit in Medium >> Purchase on Amazon
Z Palette – Black, Small >> Purchase on Amazon
 3 Shadows & 6 Looks — Eyeshadow Tutorial, Milani Brow Kit
You will need:
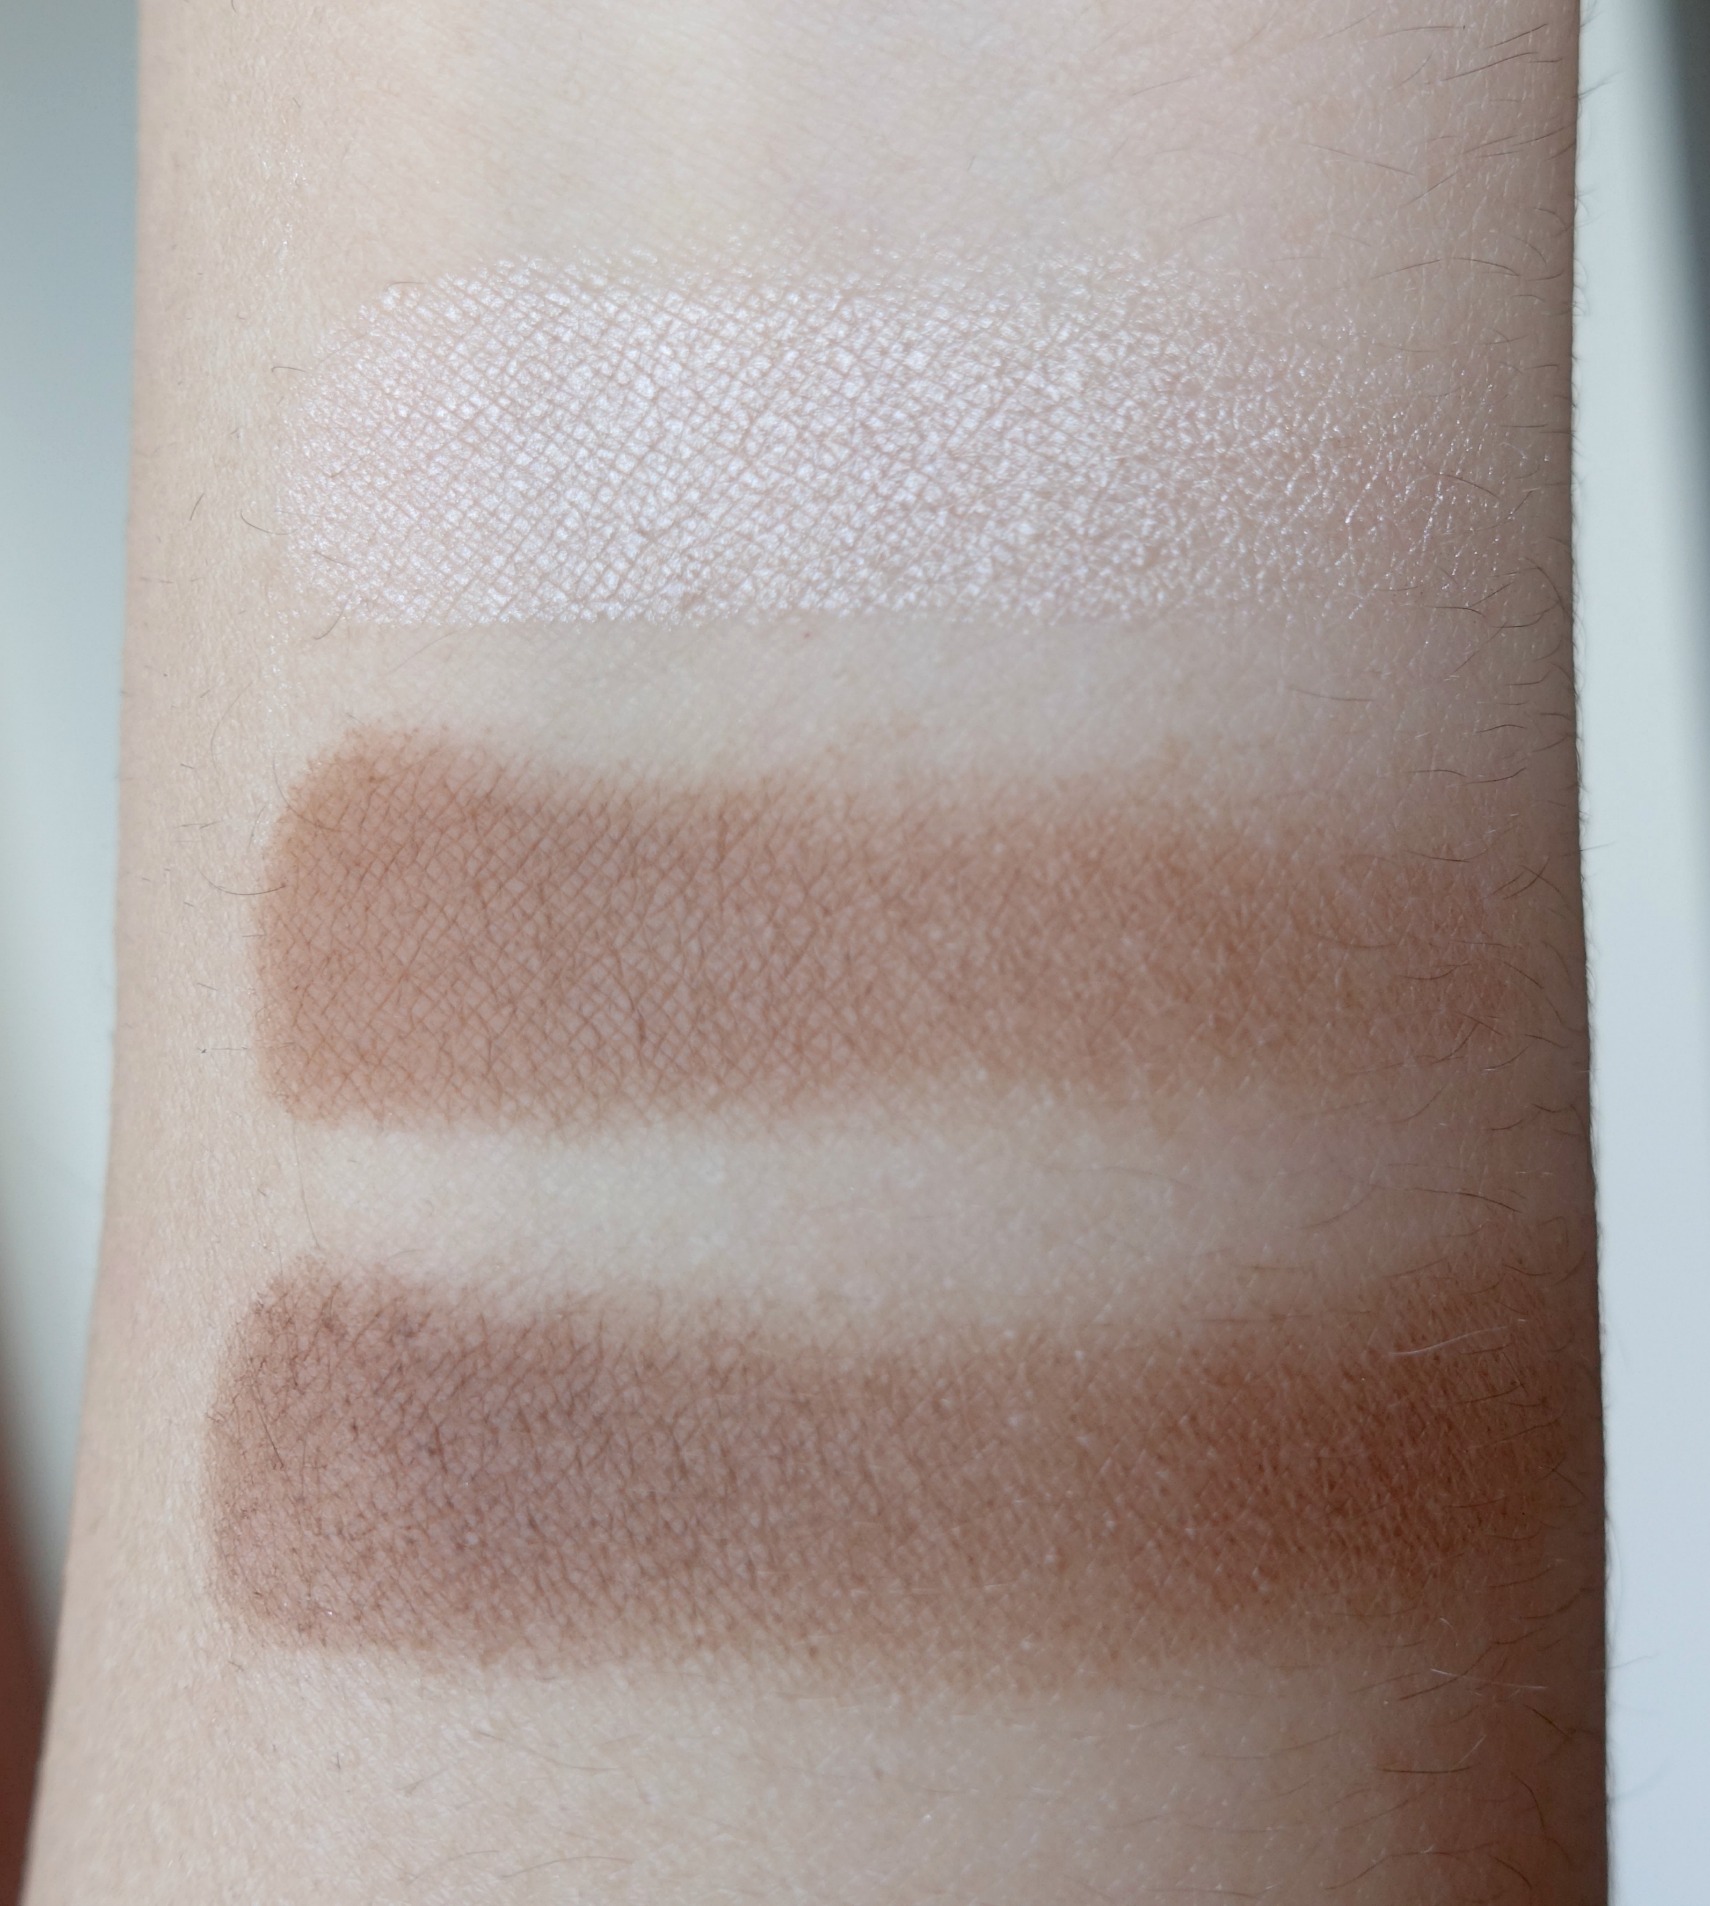
- a shimmery highlight shade — I like shadows with a slightly peachy-champagne undertone, but you could go with something with a cooler undertone if that’s more you.
- a medium matte brown shade — warm or cool undertone
- a darker matte brown shade — warm or cool undertone
These are colors I’m working with ⬇︎
Milani Brow Fix Kit in Medium >> Purchase on Amazon
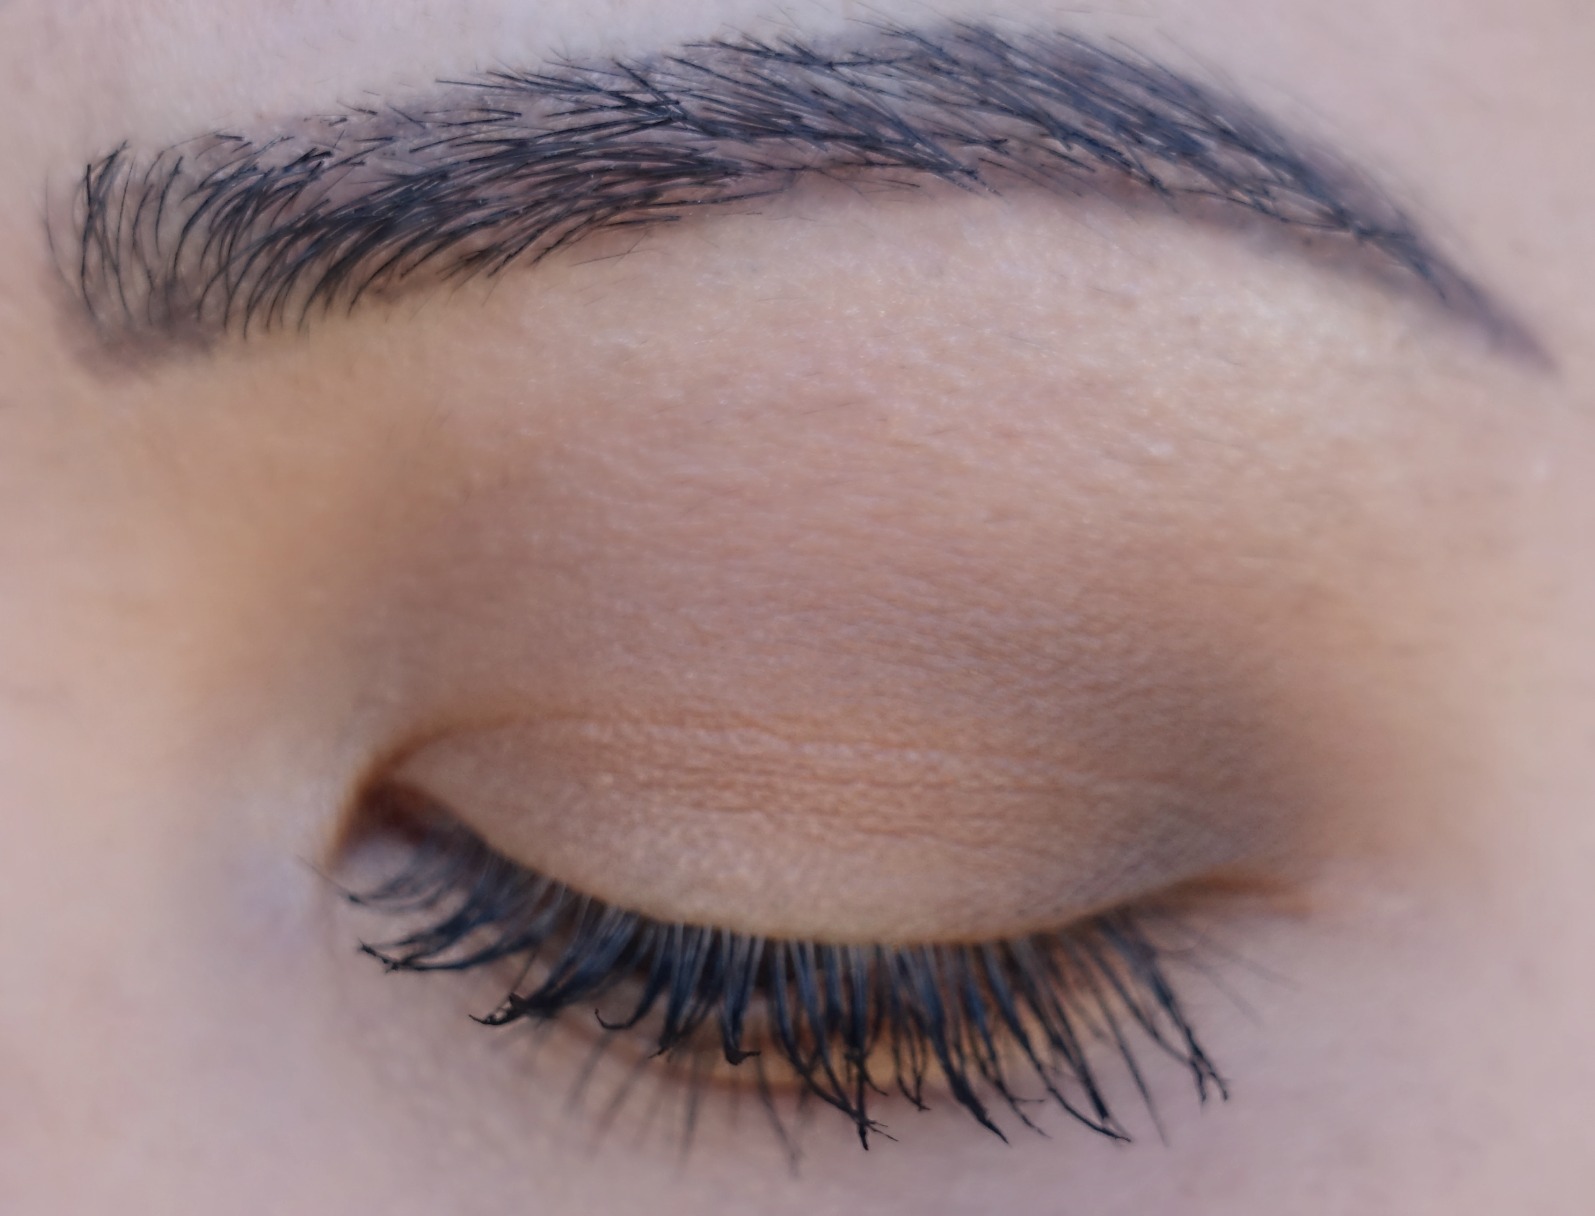
Look #1
This is the epitome of the “one shadow look.” Using a fluffy blending brush, pick up the medium brown and blend it into the crease and outer corner of the eye. Taking a somewhat stiffer, pencil brush, build up the color just in the outer corner and the outer third of the crease. Finally, sweep the color that is leftover on the fluffy brush all over the lid, and up above the crease. This look can be done in seconds, but it still gives you definition to the eye.
Don’t forget to prime your lids! Here’s my favorite eyeshadow primer >> Nars Pro-Prime Smudeproof Eyeshadow Base
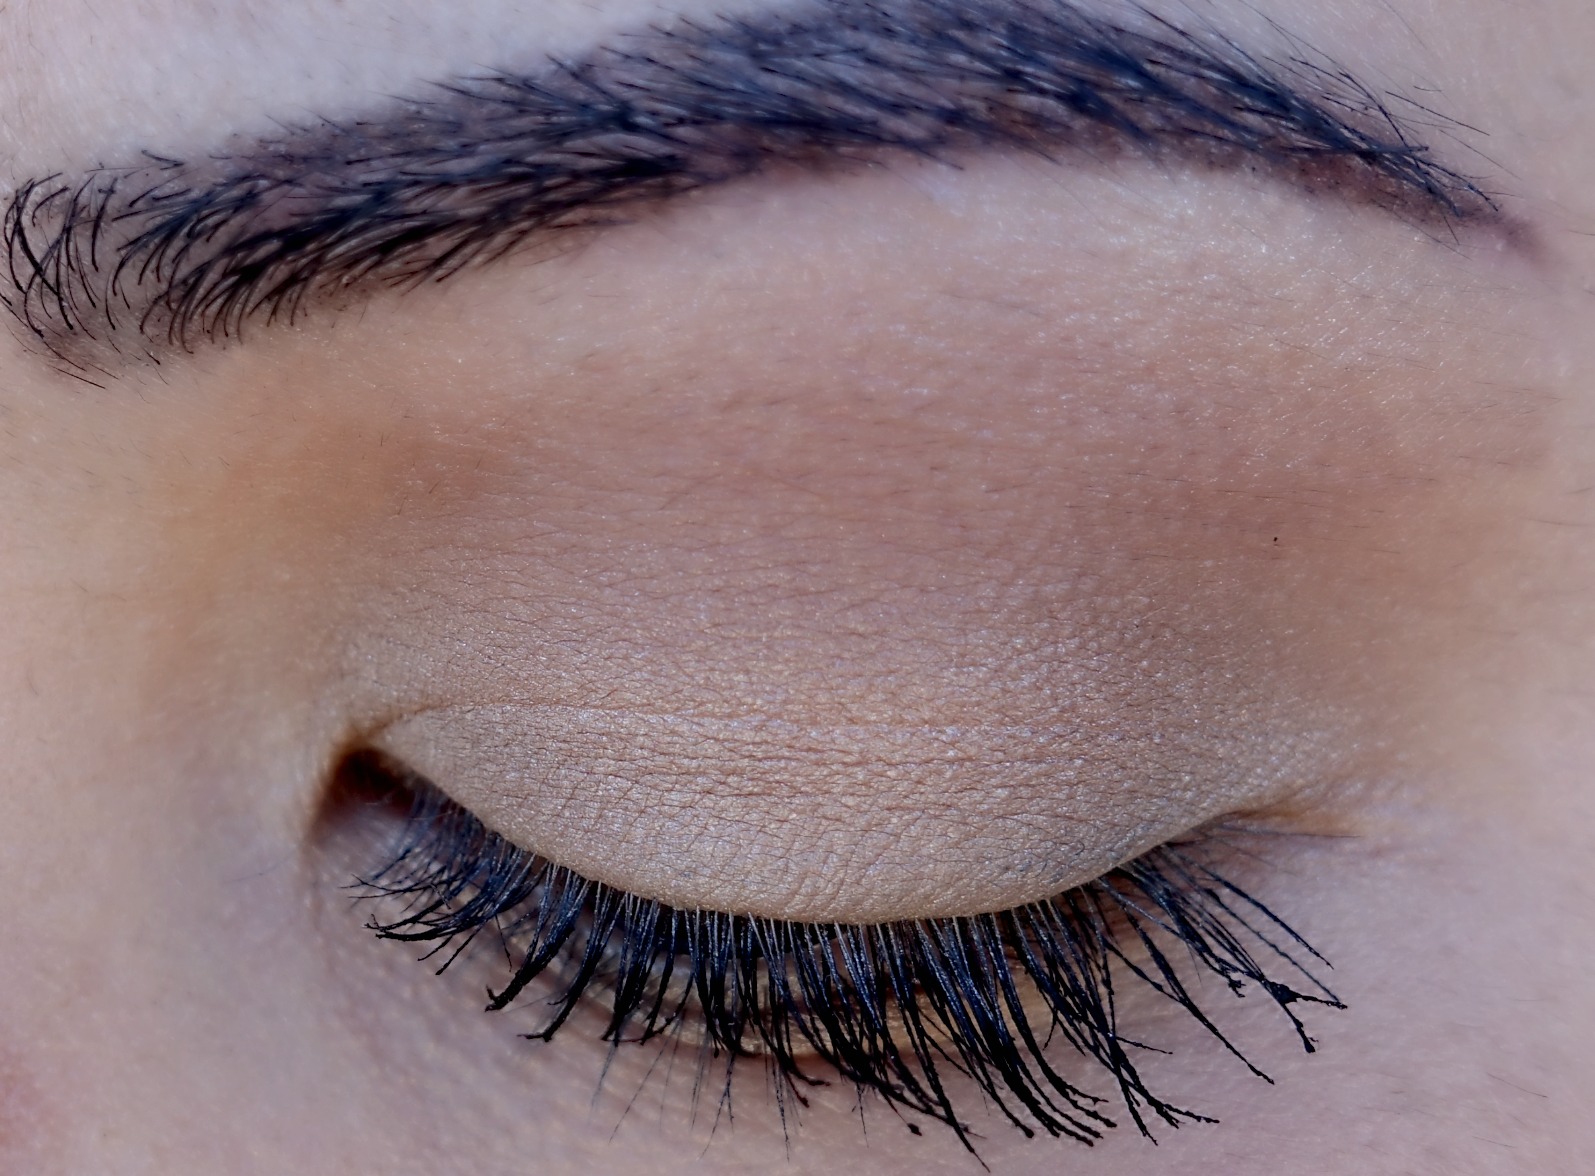
Look #2
For this look, apply the medium brown shade in the upper crease, (the area I like to call the “transition area”) using a fluffy brush. Then, pack the highlight shade on the entire lid, from the inner to outer corner, and then lightly sweep the same shade across the brow bone. This look brings light to the eyes and gives you that fresh and awake look we all need. This is the perfect, “Running late on Monday morning” look.
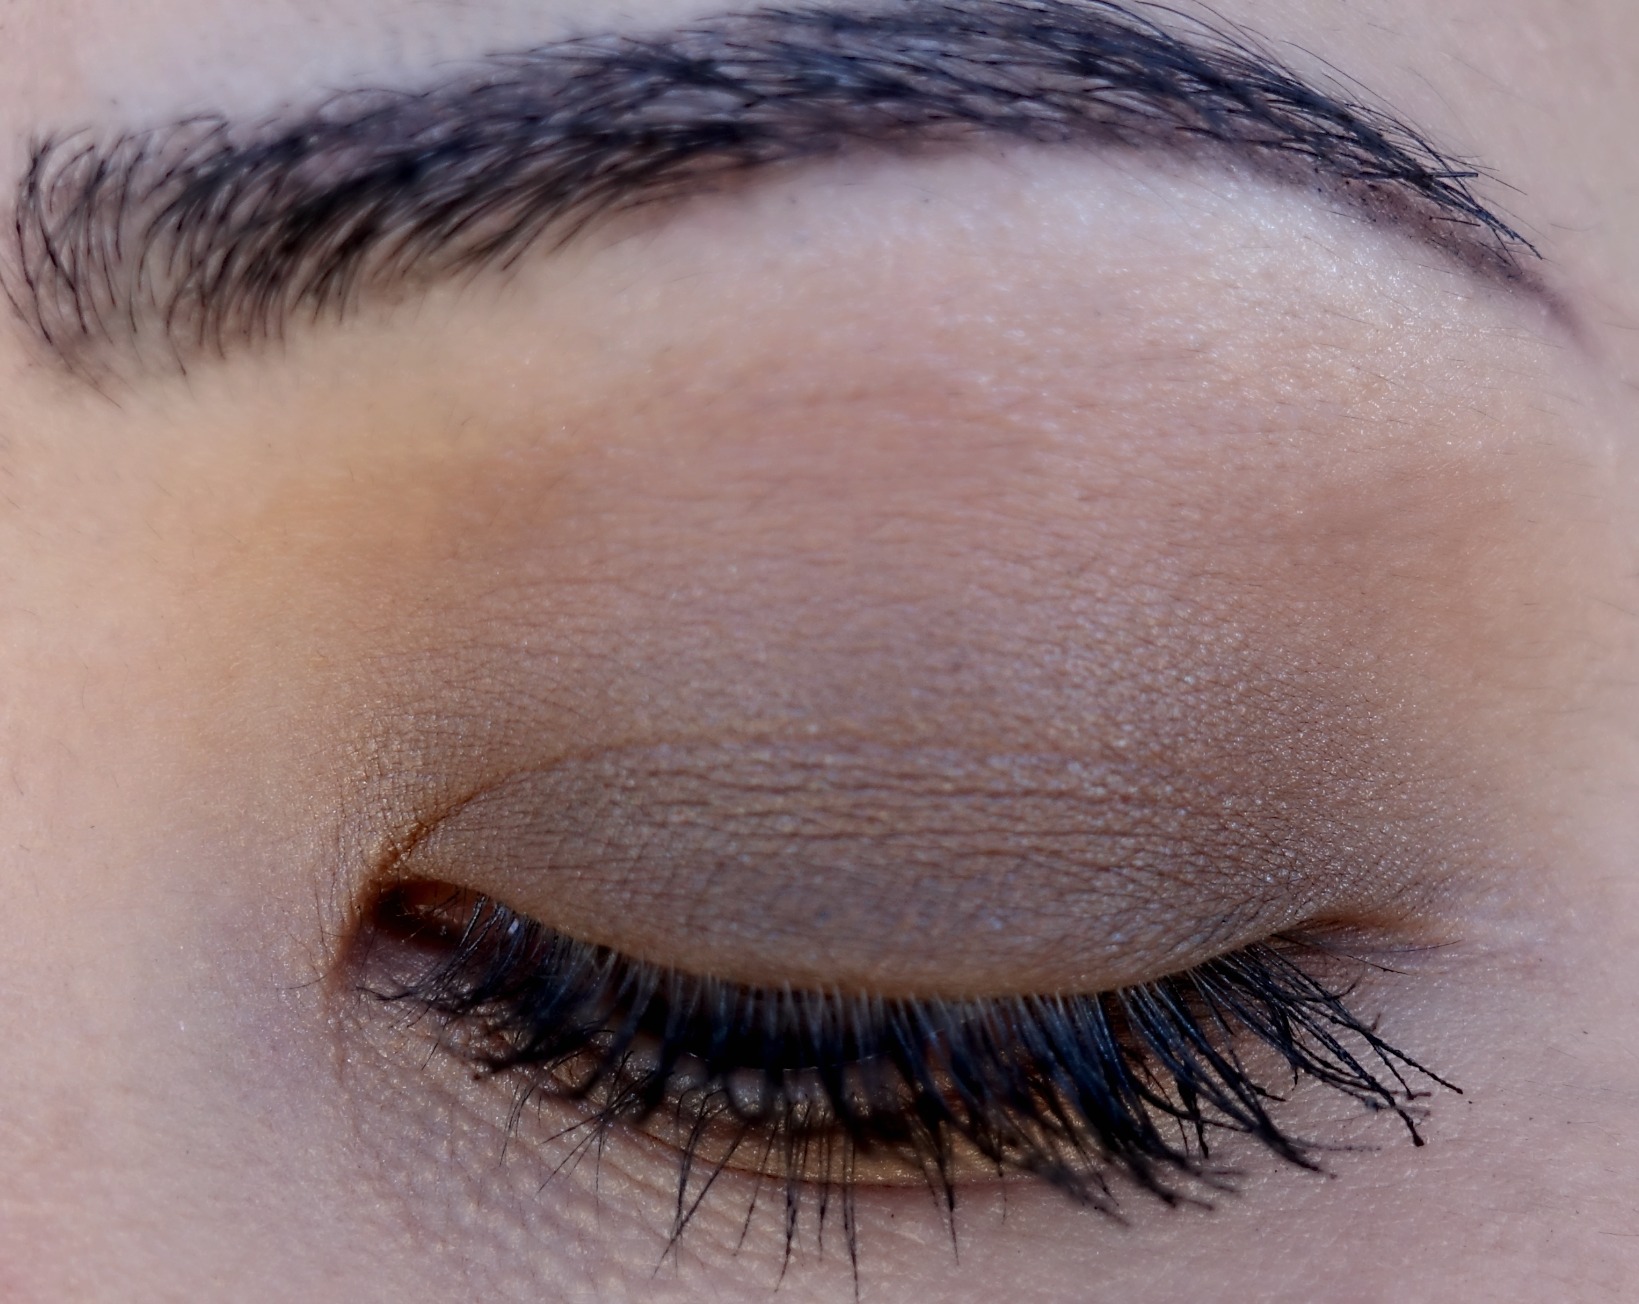
Look #3
This is the perfect simple daytime smoky eye. Simply apply the darker brown shade across the entire lid, and then blend the color upward using the medium brown shade on a fluffy brush. Dab a bit of the highlight shade on the inner corner and high point of the brow bone to bring some brightness back to the eyes.
This look is super easy to customize to your liking. There aren’t too many overlapping colors, so it is easy to build up the dark brown to make it as deep and smoky as you’d like. There is little chance that the look will end up looking muddy. I kept it pretty natural here, but there is plenty of room for drama with this look.
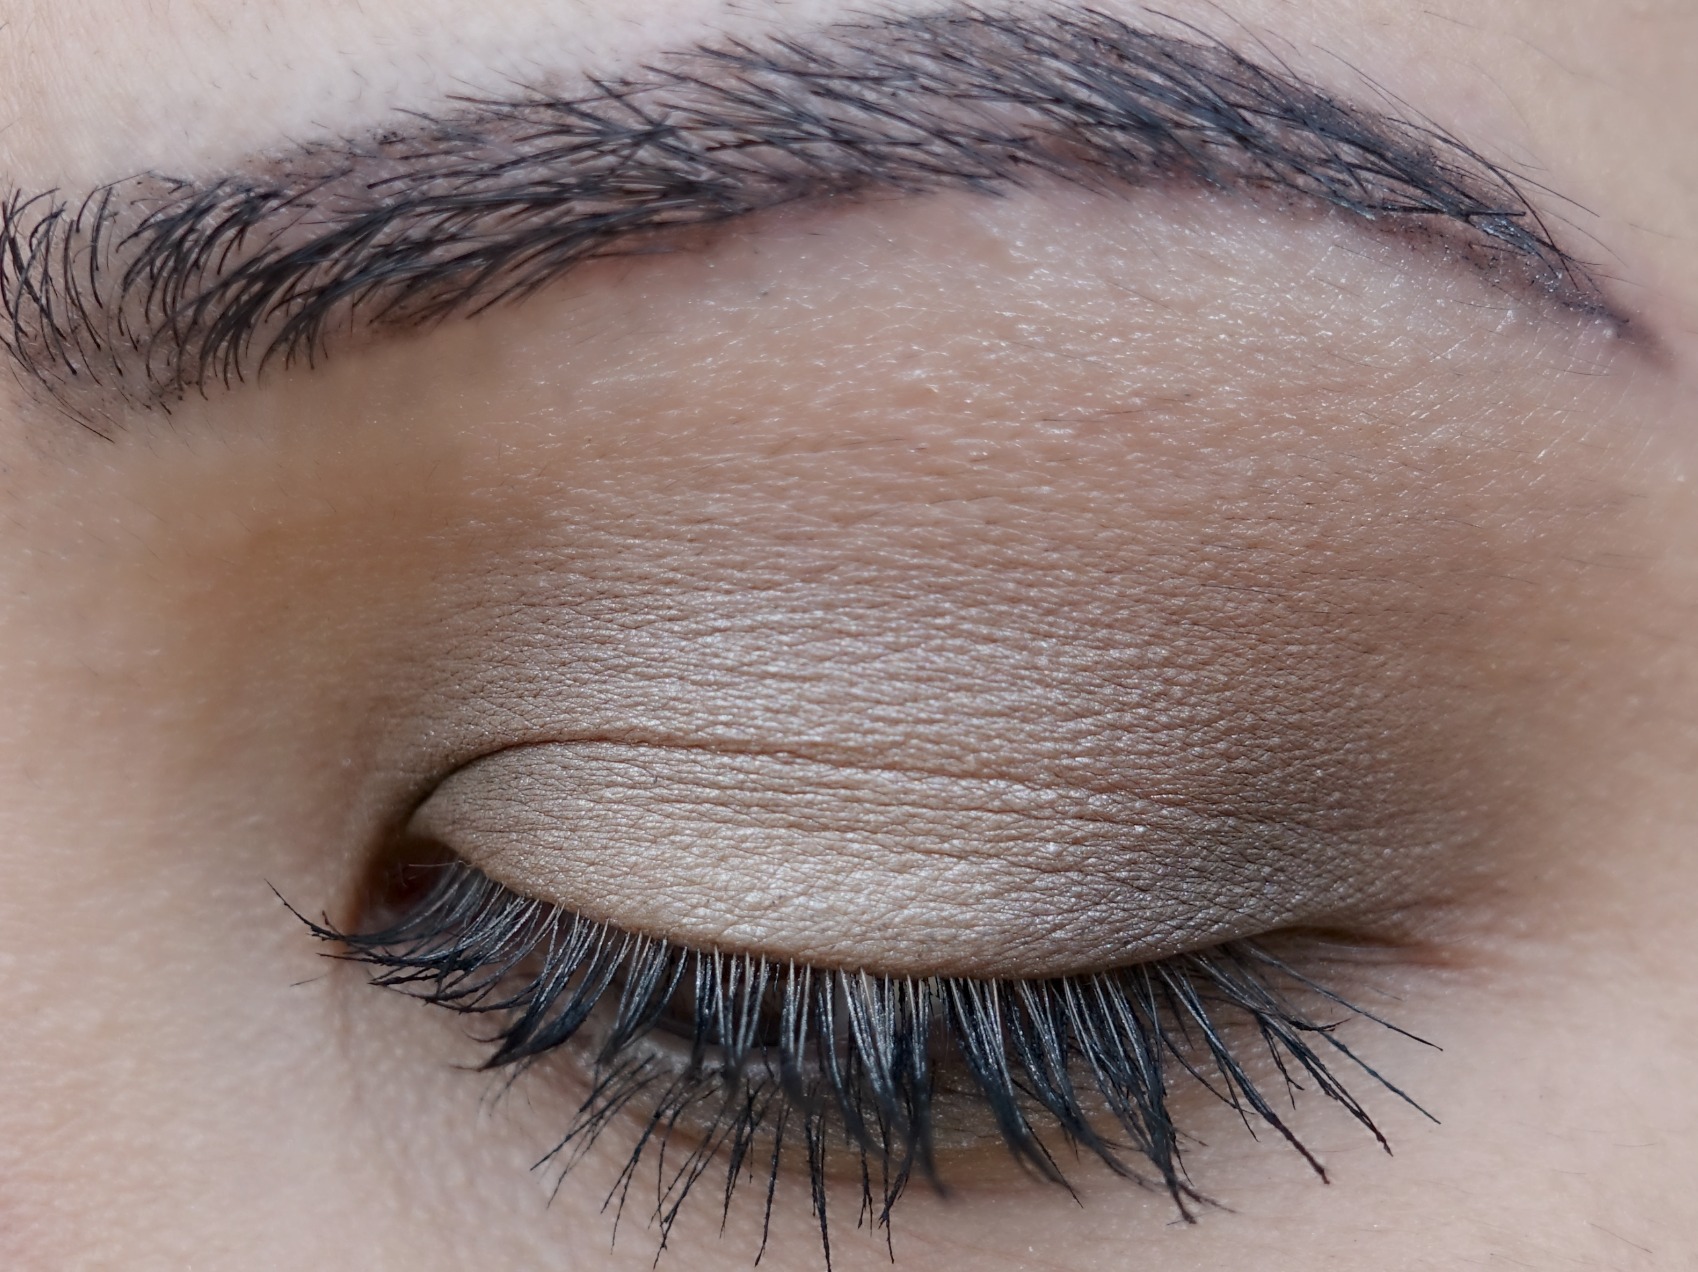
Look #4
If you are feeling a bit more fancy, you could go for a halo eye look. Using a medium pencil brush, pack the dark brown shade on the inner and outer corners of the eye. Once those areas are as deep as you’d like, carefully start dragging the same color through the crease to connect the two patches of color.
*Tip: it is easier (and less nerve-racking) to trace the path of color using only the color that is left over on the brush. Once you have the shape mapped out, you can then pick up more color to deepen the crease. Sometimes it is difficult to visualize what it will look like, so you can end up getting too much color where you don’t want it if you go in full-force from the beginning.B
Blend over the outer edges of the dark brown using the medium brown to soften the look. Finally, use your finger or a flat shader brush to tap your highlight shade right in the center of the lid. Gently blend it outwards into the dark brown.
Look #5
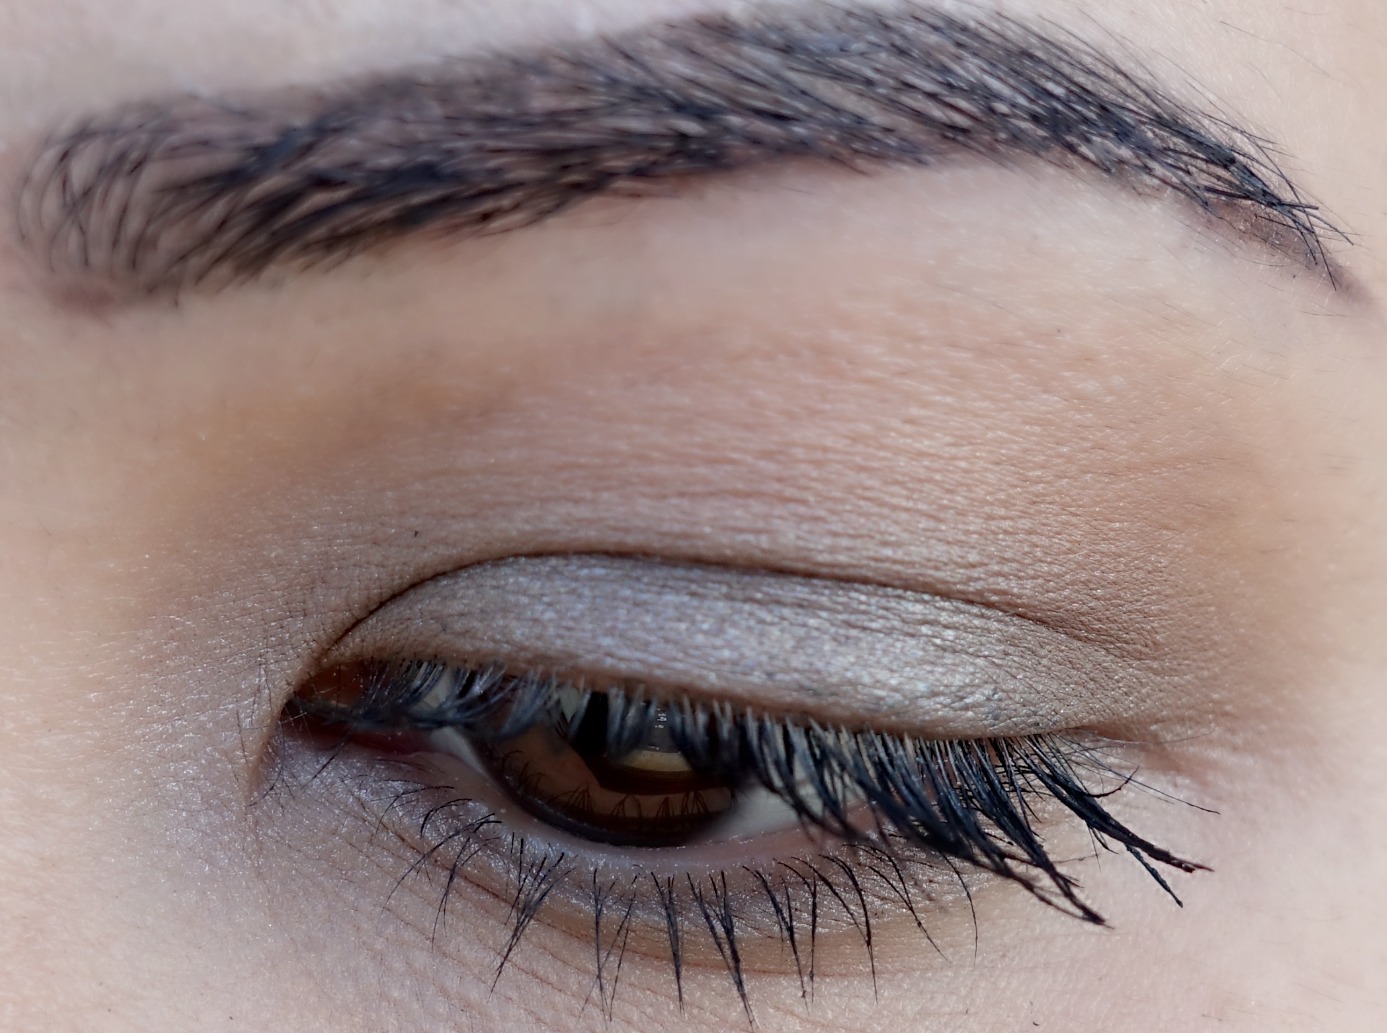
This look is very versatile, as it can be applied lightly for a daytime look, or built up to be a sparkling nighttime look. Start by applying the dark brown shade all over the lid. You can use a lighter hand and “color inside the lines” for a more daytime appropriate look, or you can extend the outer corner into a cat-eye shape and deepen the overall color for a more dramatic effect. Blend around all the edges with the medium brown shade. Then, go over the dark brown shadow with the highlight shade.
The two shades that I have combine into silvery-brown color when layered. This is something to keep in mind when you are selecting your three shades; make sure you like what the colors look like when they are layered. This is how you are able to get different looks out of the same shadows.
Look #6
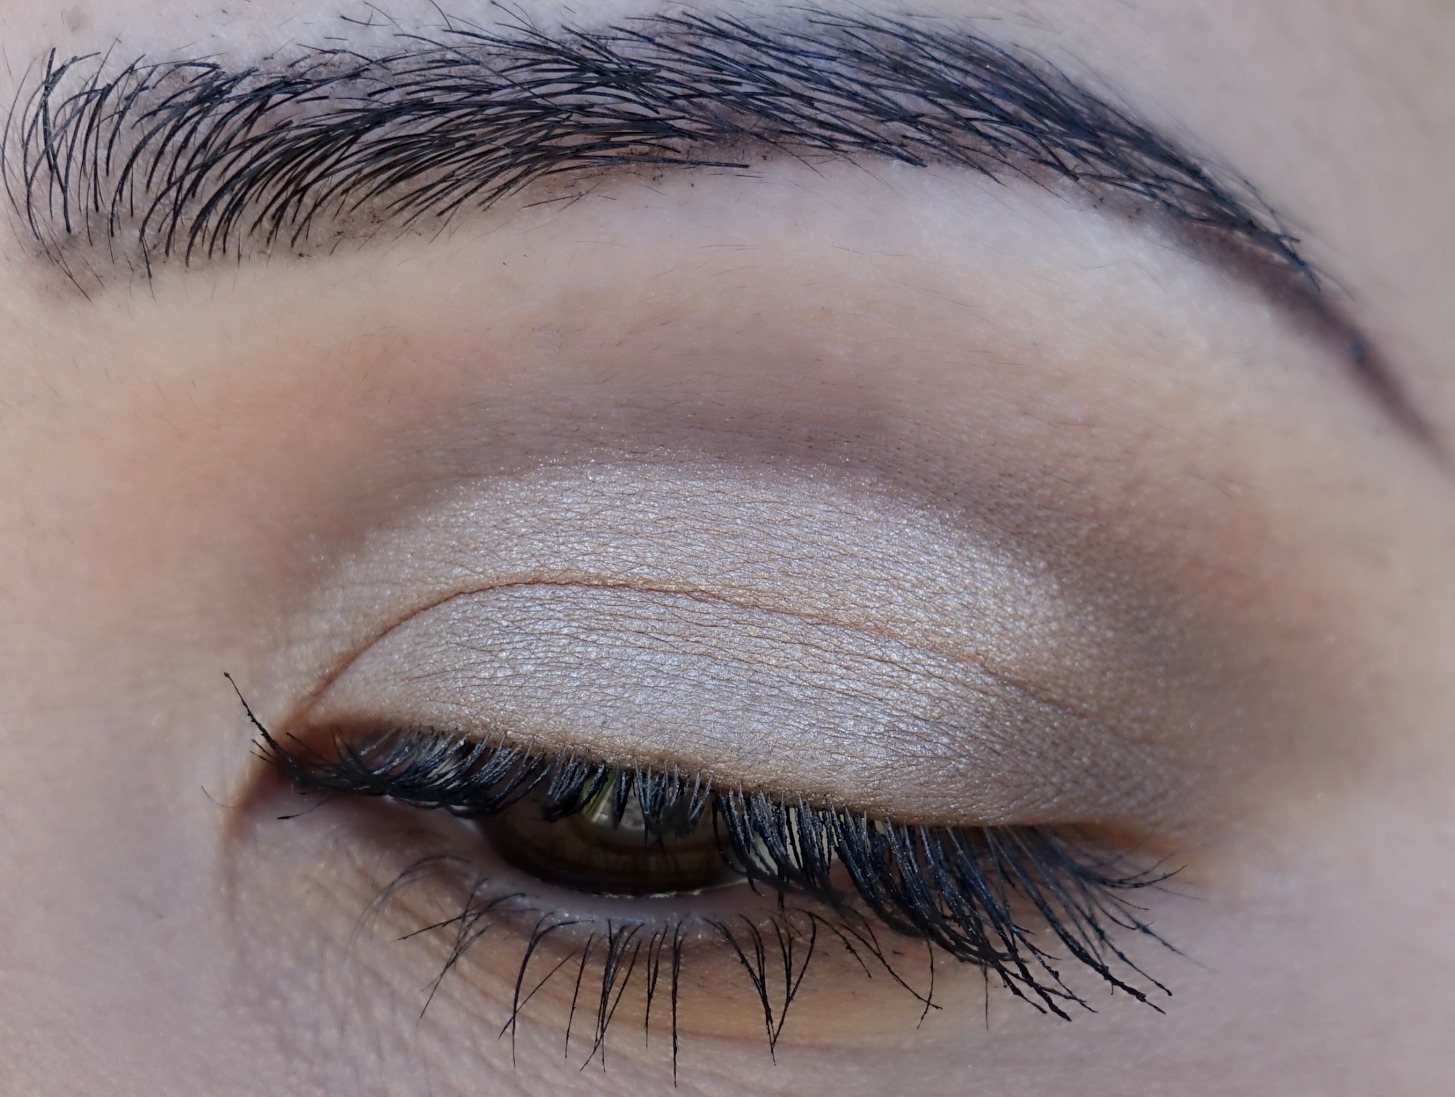
If you are feeling super daring, don’t let your arsenal of only three shadows stop you from doing a dramatic cut crease look. Now, I’m still working on my cut- crease game, so this is more for inspirational purposes, rather than demonstration purposes. 😉 But you get the idea.
Go on, get wild with your seriously un-wild colors.
You’ll be surprised what you can come up with.
There’s a reason why neutral palettes are so popular.
That’s all for today!
If you like this post, you’re probably love this one to >> Daytime Smoky Eye Featuring Tarte Tartelette In Bloom Palette
If you find this post interesting, informative, or just plain entertaining, tell me about it in the comments below! And don’t forget, sharing is caring. Share this post!
Till next time. ♥︎
Sign up for my free monthly e-journal, The Millennial Maven Love Letters for exclusive content + millennial inspiration and lifestyle hacks. Plus get instant access to my library of on-the-go style downloads!
FTC- This post is not sponsored by any brands mentioned. I purchase all products myself. All opinions are my own. Some links may be affiliated.
I love this kind of posts that focus on techniques and not just tons of products. The fact that you can create so many looks from one little product is awesome and inspiring. Thanx for sharing!
-Blanche
This is what my blog is all about, so I’m glad you enjoy! I want to share beauty knowledge, not just beauty consumerism 😉 Thanks for reading! 🙂 xo
I own so many eyeshadows but a lot of the time I still don’t know what to do. I like this as a cheatsheet of sorts for eyeshadow styles. Colors are easy, it’s thinking of a style that’s the hard part! Bookmarking it 🙂
That’s the problem I have too. Perhaps I created this post as a cheatsheet for myself 😉 Thanks for reading! 🙂 xo
I love cut crease looks but they always look so bad on me! I think it would be a great idea if you could do a post with tips on how to do a cut crease on different eyes. Just a thought! Dora xo
I will definitely add that to my list, as soon as I practice and figure it out for myself. I’m still learning that one! Thanks for reading 🙂 xo
Useful information here. Followed… =D
any particular reason why you are using a brow powder instead of eyeshadow?
Hi Jenny! Not really, I just like this little trio as eyeshadows, plus it includes the three basic shades I think are the Mose necessary- a matte medium brown, a matte dark brown, and a light shimmer. But you can obviously use any eyeshadow for this. Thanks for reading! 🙂 xo
It’s super refreshing to see someone use just a few eyeshadows to create so many different looks. You always see people using 12 eyeshadows on one look then the palette disappears and they start using something else. This proves you don’t need 1000’s of eyeshadows to look good! This is an awesome idea!
Thank you so much, Shelly! I agree that you don’t need a bajillion eyeshadows in order to create beautiful makeup looks- all you need is some creativity. Thanks for reading! 🙂 xo