This post contains affiliate links. To learn more, hop over to our Disclosure page.
Fall has finally reached Honolulu, my friends!
And by that, I mean we’ve just experienced the first night of the year when it was actually cool enough to sleep minus the AC blasting. I wait for this time of year. Rather impatiently, might I add.
To be frank, there is no such things as true fall weather where I live. It just doesn’t happen. The weather remains constant, save for a few cool gusty nights and rainstorms.
Actually, trees do change colors. They change from brown to green. Because they actually get some rain here on the leeward side. Yeah, I take what I can get.
So what does this mean for you?
It means I can finally start wearing fall-inspired makeup and passing the looks onto you in some fun fall makeup tutorials! If I did this any earlier, I’d feel totally insincere, and that’s not how I want to feel blogging.
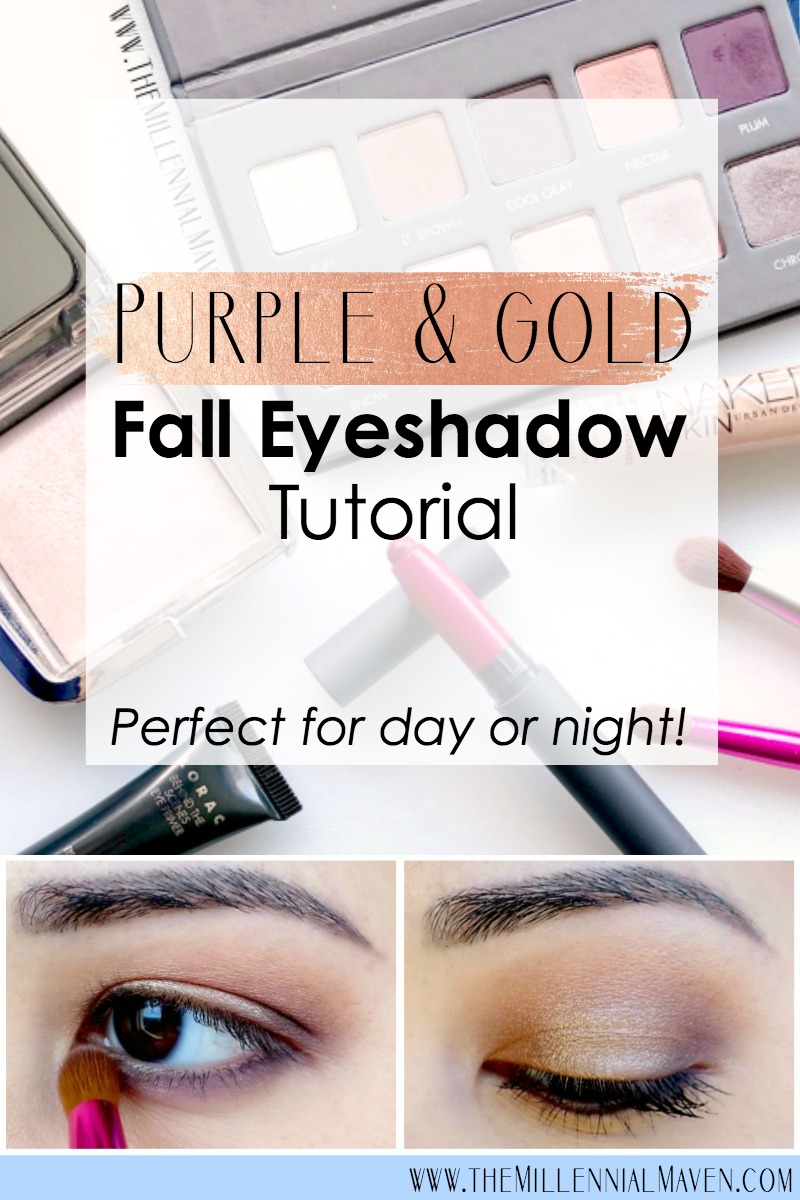
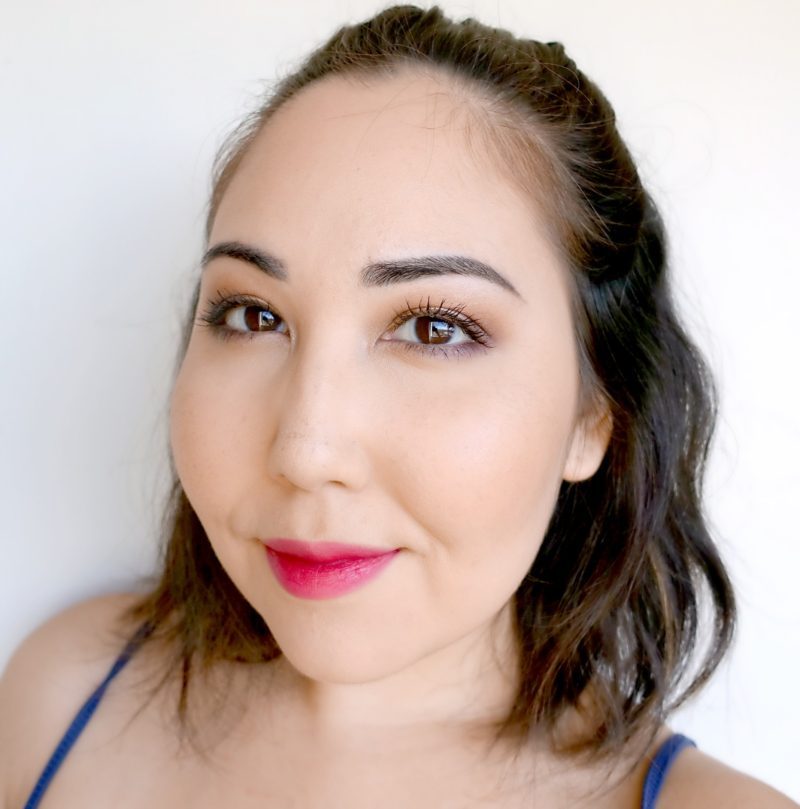
This fall makeup look is super pretty and easy to pull off for day or night. The purple adds just hint of color without going overboard, and the rosy golds keeps it festive.
Let’s get on with this Gold & Purple Fall Makeup Tutorial!
Starting off with the eyes
Since this fall makeup tutorial involves a few bold shadows, it makes the most sense to begin with the eyes so any fallout or smudges can be easily wiped away.
Fill in your brows to frame your eyes
I always fill in my brows first thing. I find that it helps to define the shape of your eye, plus having the tail there gives a definitive guide on where your shadow should end.
Fill in your brows however you see fit. I chose to go with a darker, charcoal color that really stands out against my skin. The eyeshadow is very soft and doesn’t use any liner, and so having a stronger brow helps give my eye area more structure without looking too harsh.
For my brows today, I used my L’Oréal Brow Stylist Definer in Dark Brunette.
*Bonus I’ve written a full review on the L’Oréal Brow Stylist Definer if you’re interested. See how is stacks up to the revered Anastasia Brow Wiz! >> See the review here.
L’Oréal Brow Stylist Definer >> Purchase on Amazon
Apply primer and set
Prime your lids with your favorite eyeshadow primer to ensure the shadow you work so hard on stays put all day. Blend the primer all over your lid, up onto your brow bone, and down on your lower lash line. No shadows will be escaping today.
I used my Lorac Behind The Scenes Eye Primer to match my Lorac shadows. I like being matchy-matchy like that.
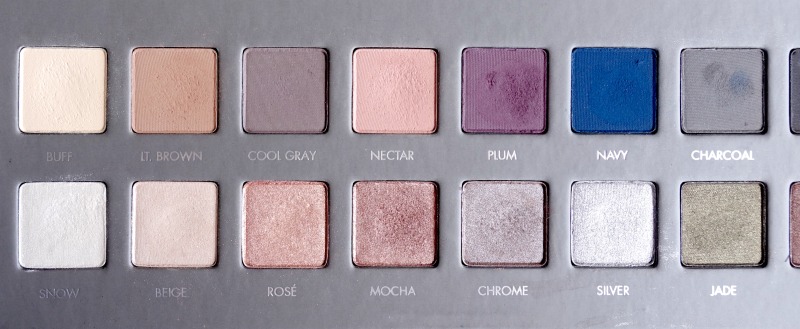
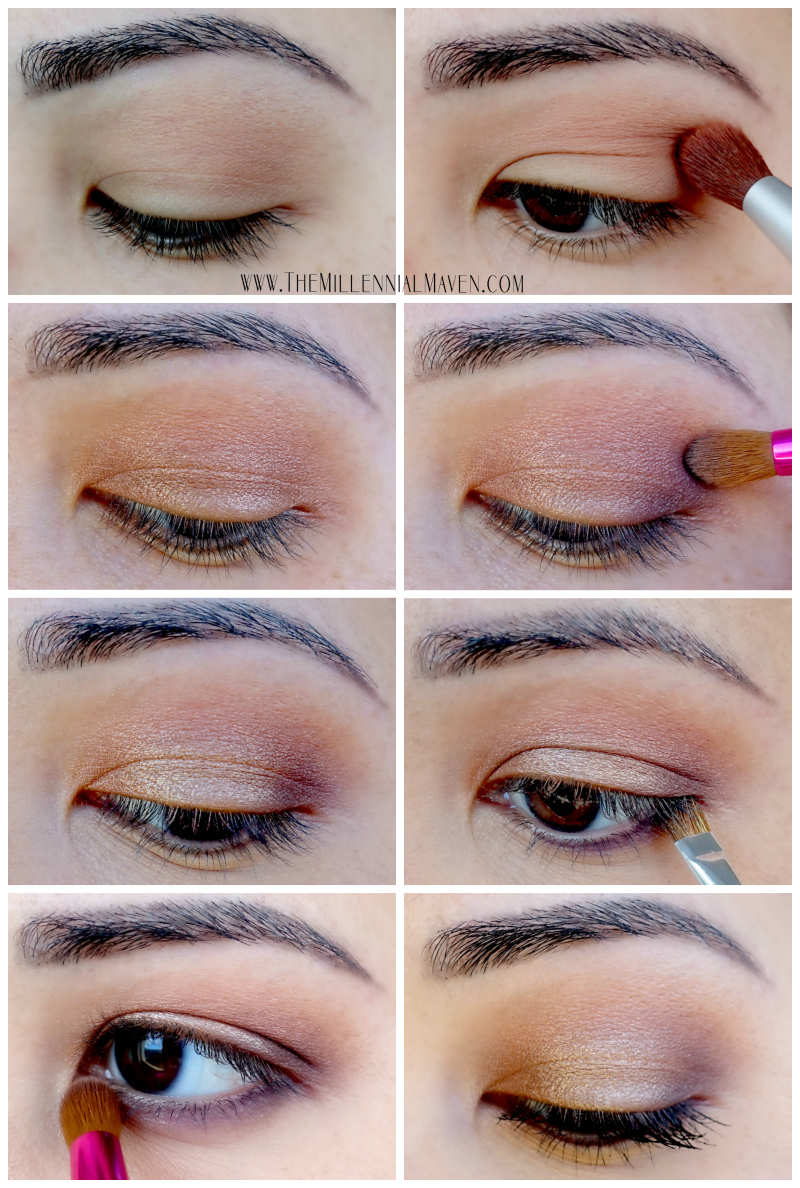
Set the entire area with an eyeshadow that’s similar, or slightly lighter than your skin tone. For me, BUFF from the Lorac Pro 2 Palette works well. This gives you a smooth surface so all the more pigmented shadows coming up blend evenly and don’t end up looking patchy.
Lorac Behind The Scenes Eye Primer >> Purchase on Amazon
Begin defining your crease
Using a fluffy blending brush, lightly dip into NECTAR from the Lorac Pro 2 Palette.
Buff this color all over the crease. No need to be too neat with this, but think about where you want your shadow to end, and don’t go beyond that. Use this color to help define the overall boundaries of your look.
Next, deepen the color profile by dipping the same brush into LT. BROWN and blending that over the top of NECTAR, keeping LT. BROWN ever so slightly within the boundaries set by NECTAR. In other words, let NECTAR peek out from behind on all sides. This creates a beautiful gradient and keeps the finished look looking blended and seamless.
Lorac Pro 2 Palette >> Purchase on Amazon

Lay down your lid color
Using a shader brush, (really, anything will do,) apply ROSE all over the lid. Blend from inner corner, to outer corner, and up to the crease.
Carefully blend the color upward to meet your crease shades, but be careful not to cover them up. Go back in with your fluffy blending brush if necessary to help the shades mesh together seamlessly. The shades should look like they’re meeting in harmony, and not like they’re battling it out for the title of “Most Visible Eyeshadow Color.”
Further define your crease
Now comes the fun part. Take a smaller blending brush and tap it lightly into PLUM.
FYI- The brush I’m using in the photos came in a set from Sephora. It is very soft, but it features a more precise tip than the previous fluffy brush. Instead of puffing outward, these bristles stay on the straight-and-narrow, and don’t spread in all directions when you apply pressure. It places color exactly where you want it, not in a general neighborhood.
Start applying PLUM right at the outer corner and softly blend inward. Work with the color to get a nice blend, but make sure the color stays on the outer 1/3 of your eye.
Using the tip of your brush, gently feel around for the edges of your eye socket, and use this as a guide when blending PLUM upward into the crease. Concentrate the color right in the socket, and then drag the color slightly inward to blend.
Continue deepening the color until you are satisfied with the look.
Sephora Collection Here’s The Skinny Brush Wrap >> Purchase at Sephora
Add a bright pop to the center of your lid
When working with deeper colors, you always want to add brightness somewhere to counteract the darkness. It’s a balancing act.
Dip your ring finger lightly into BEIGE and tap that on the center of your lid, right at the highpoint of your eyeball. This adds a pretty pop of brightness and adds dimension to the look.
Carefully blend the color out from the center a little bit, but don’t take it too far. You don’t want this color to take over the look. Use a small brush for this if necessary.
Lorac Pro 2 Palette >> Purchase on Amazon
Moving on to the face
Now that most of the eye look is complete, we can move on to the face without worrying about ruining it later.
Apply your favorite primer and foundation. I skipped primer because I’m lazy, and then I applied a thin layer of Too Faced Born This Way Foundation >>Click here to see my review<< all over my face using a BeautyBlender.
For a more natural finish, I went in with my Maybelline Fit Me Concealer under my eyes, and a little on my nose, forehead, and chin. This pick matches my skin tone exactly and features medium-natural coverage.
For a more contoured look, go for a heavier concealer in a slightly lighter color.
Too Faced Born This Way Foundation >> Purchase at Sephora
BeautyBlender Original >> Purchase at Sephora
Maybelline Fit Me Concealer >> Purchase on Amazon
Go for a neutral blush
Since there’s already some color in the eyes (and lips,) stick to a neutral blush to even out the look. You know, the blushes that look ugly and boring in the pan. Yeah, those.
I went with my E.l.f. Matte Blush Duo in Soft & Subtle. It features a soft brown shade with a hint of rosiness, as well as a muted peach shade.
I use the brown shade like a light bronzer by concentrating it below my cheekbones, and then blending it upward. I also dust the same shade on my forehead and jawline. If you use a light hand, you won’t end up looking weird. Plus, the ever so slight rosiness mimics the Rose-toned Aden filter on Instagram. Which if you’re paying attention, you can tell is my obvious favorite.
I then blend the peach shade onto the apples of my cheeks for a natural glow that doesn’t compete with the rest of the look.
E.l.f. Matte Blush Duo in Soft & Subtle >> Purchase from Elfcosmetics.com
Now let’s finish off the eyeshadow
For the under eye area, start by dipping a liner brush into PLUM. Apply this onto your lower lash line, concentrating the color on the outer half of your eye. Try to get the color as close to your lashes as possible. Since we’re not using any liner, we don’t want there to be a gap there.
Next, pick up a tiny bit of ROSE on your small blending brush, (make sure to wipe it off first,) and place that on the inner half of your lower lash line. Blend the two colors together in the middle.
Highlight and apply mascara for the finishing touches
Select a highlight shade for your inner corners and brow bone depending on how dramatic you want the finished look. Since I did this for day time, I opted for BEIGE. SNOW would be beautiful for an evening look.
If there are any harsh edges, now is the time to blend, blend, blend.
Finally, apply your favorite mascara to your top and bottom lashes. I went with my Nars Audacious Mascara in Black Moon today.
Perhaps throw on a pair of falsies. But I was heading off to a Toyota dealership for some serious daytime business, and the last thing I needed was my lashes falling off on some important paperwork.
Nars Audacious Mascara in Black Moon >> Nars Audacious Mascara in Black Moon
Spruce it up for nighttime
Thanks to the purple, this look is super easy to dramatize for evening.
You can always deepen the purple areas using the same small blending brush.
If you’d like just a bit more definition, try blending a small amount of CHARCOAL into the crease, just where the purple starts curving around. This gives more definition to the eye without darkening the overall look too much.
For an overall deeper look, expand the purple outward to cover a larger area. Then, using a small brush, place a little bit of BLACK just at the outer corner of the eye.
And of course, now is the time for those falsies, girl!
My favorite lashes — Ardell Eyelash 110 Black >> Purchase on Amazon
My favorite lash glue — Duo Lash Adhesive Clear >> Purchase on Amazon
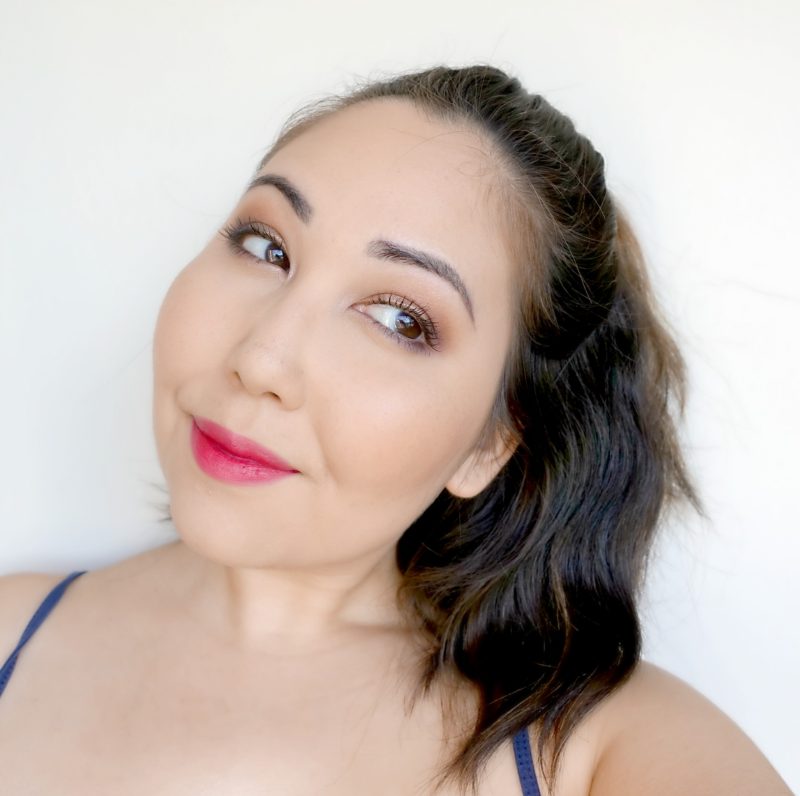
It wouldn’t be a fall makeup tutorial without red lips
I’ve been totally into the “I just ate a popsicle” look. Can you tell?
To get the look, apply a thin layer of a creamy red lip color all over your lips. Here, I’m using my Bite Matte Creme Lip Crayon in Coulis. Blend the color using a lip brush. Then, apply a second layer just to the center portion of your lips. But you probably knew that.
*Note- The shade “Coulis” is no longer available, but the shade “Fraise” is quite similar.
See, isn’t that fall makeup tutorial just the easiest thing? Now off you go to try it for yourself!
Bite Beauty Matte Crème Lip Crayon >> Purchase at Sephora
That’s all for today!
Like this fall makeup tutorial? You’ll surely love this one too >> Fall Makeup Tutorial — “Warm Autumn Mattes”
If you find this post interesting, informative, or just plain entertaining, tell me about it in the comments below! And don’t forget, sharing is caring. Share this post!
Till next time. ♥︎
Sign up for my free monthly e-journal, The Millennial Maven Love Letters for exclusive content + millennial inspiration and lifestyle hacks. Plus get instant access to my library of on-the-go style downloads!
FTC- Not sponsored. I purchased all products myself. All opinions are my own. Some links may be affiliated.
Leave a Reply