This post contains affiliate links. To learn more, hop over to our Disclosure page.
Valentine’s Day makeup is the best makeup.
Why is this, you ask?
Because you are doing it for someone you love- whether that person is a guy, a girl, or simply yourself.
Regardless of who you’re hanging out with on Valentine’s Day, you makeup should have you feeling beautiful and comfortable, and not stressed out.
You know what I’m talking about- when you have a super glamorous look in mind, 30 minutes to get ready, and all the while harshly threatening your wobbly hand that it had better not blow your one shot at achieving the perfect wing.
It never works out well.
I’ve created this beautiful, yet attainable makeup look for all you busy ladies out there who don’t have room to stress about something as mundane as eyeliner.
It’ll have you feeling the love in no time. Not to mention, the kiss-proof red lipstick of choice might just give you a little extra incentive to let your inhibitions loose… whatever that means!
Now let’s get into the tutorial using (almost) all Coastal Scents eyeshadows!
Let’s talk products
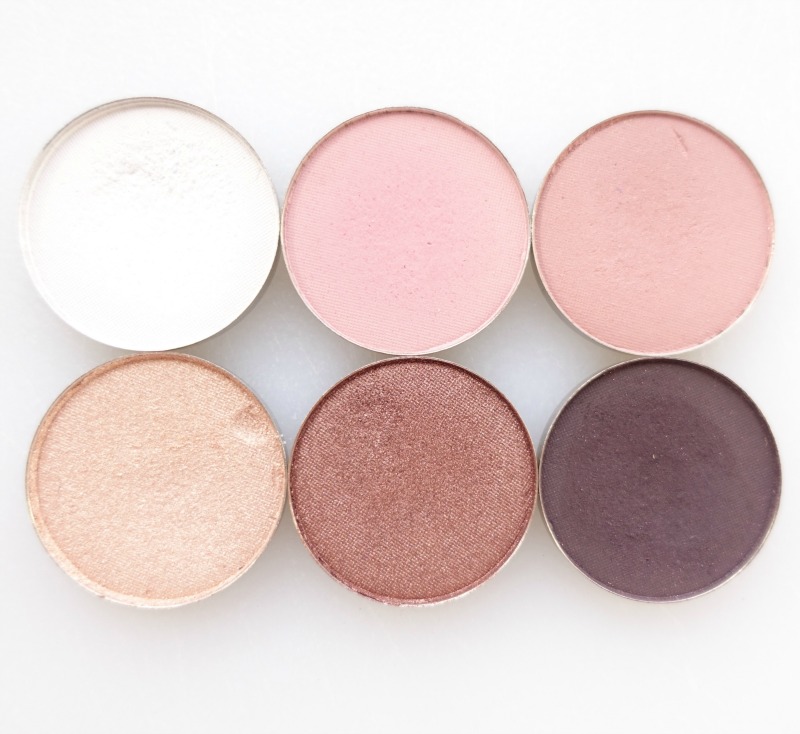
Coastal Scents Eyeshadows in Cloud White, Pale Nude, Mauve, Nectar, Amaretto, & Black Berry (CoastalScents.com)
Ulta Ultra Slim Brow Pencil in Dark Brown (Ulta)
Lorac Behind The Scenes Eye Primer (Amazon)
Revlon Colorstay Creme Eyeshadow in 730 (Amazon)
Nars Audacious Mascara (Sephora)
E.l.f. Mineral Infused Face Primer (Elfcosmetics.com)
Too Faced Born This Way Foundation (Sephora)
E.l.f. HD Lifting Concealer (Elfcosmetics.com)
Make Up For Ever Ultra HD Invisible Cover Stick Foundation (Sephora)
Wet n Wild Contour Palette in Dulce De Leche (Amazon)
Milani Baked Blush in Delizioso Pink (Amazon)
Becca Shimmering Skin Perfector in Opal (Sephora)
Ciate London Liquid Velvet in Diva (Sephora)
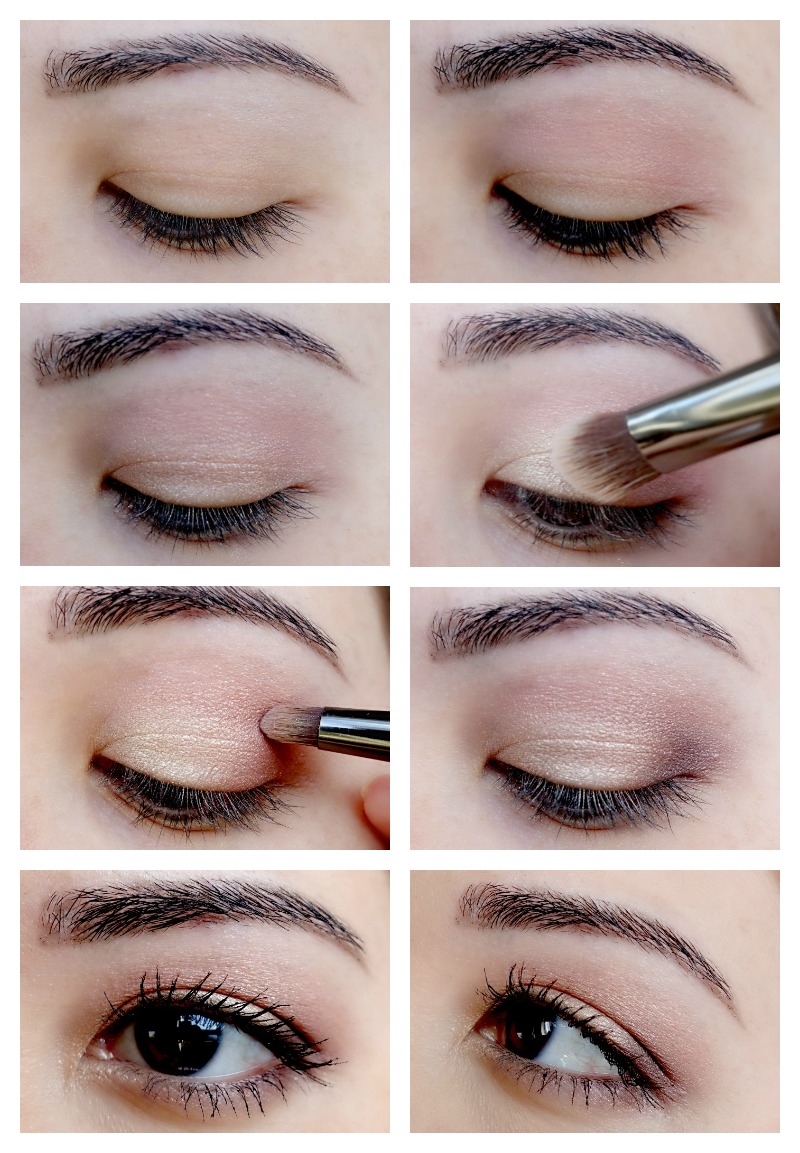
Fill in your brows and apply eyeshadow primer
Start by lightly defining your eyebrows. I’m using my Ulta Ultra Slim Brow Pencil in Dark Brown– the ashy shade is perfect for achieving a natural brow look in a snap.
I decided on a softer brow to go with the overall romantic feel of the look, but of course, you can define your brows however you’d like.
Next, apply a small amount of eyeshadow primer all over your lids, from the lash line up to the brow bone. Gently swipe the product under your lower lash line as well. Here, I’m using Lorac Behind The Scenes Eye Primer.
Sweep matte white shadow over your brow bone
Add a soft base highlight on to your brow bone with a matte white eyeshadow.
Using a fluffy brush, concentrate the shadow beneath the outer half of your eyebrow, then blend the color in towards your nose, and slightly down into the crease. This will help your transition color go on even more smoothly.
I’m using the shade Cloud White by Coastal Scents.
Light pink for your transition shade
Using the same fluffy brush, pick up the shade Pale Nude and use it to create a transition area between the highlight shade and your crease.
Take your time blending this shade. You want it to look super soft and blown out.
Define the crease with a mauve shade
Next, begin layering on the shade Mauve slightly lower in the crease.
The slightly deeper shade will help bring some definition to the crease area. In addition to looking pretty, having a defined crease is helpful for making sure the rest of your eyeshadows are placed correctly.
Apply shimmery pink creme shadow all over your lid
Using the included applicator, swipe Revlon Colorstay Creme Eyeshadow in 730 all over your lids.
Be careful not to go up past where you placed Mauve. See, I told you it would be helpful.
Set creme shadow with a shimmery champagne shade
This is where you can totally vary your color choices to achieve the exact look you want. At first I used the shade Nectar to set the creme shadow. It worked, but the look turned out a bit more gold-toned than I would have liked.
I ended up going over my lids again with a dusting of Becca Shimmering Skin Perfector Pressed in Opal, which has a slightly more beige undertone. Overall, I thought this shade matched better with the pink and purples in the look. It just goes to show, makeup is all about experimentation!
Deepen crease with a medium brown shadow
Darken the crease a bit more using Amaretto on a small smudge brush. Place the brush down at the outer corner of your eye, and carefully drag it upward into the crease by following the curve or your eyeball. Concentrate the color right where your eyeball meets your brow bone.
Darken the outer corner
Finally, dip the same brush into Black Berry and place the color just in the outer corner of your eye. You can skip this if you desire and even softer look, but it does add some nice definition.
Smudge out your lower lash line
Very lightly dip back in to Black Berry and smudge it as close as possible to your lower lash line. Keep more of the color on the outer half of your eye, and then gently blend inward only enough to not have a harsh line.
For a slightly smoky look, blend a small amount of Amaretto across the entire lash line. For a brighter look, use Nectar instead.
Apply the finishing touches
I skipped eyeliner for this look because I wanted to keep it soft and natural. But of course, a bit of smoky black liner on the water line and tight line will add a touch more drama.
Apply your favorite mascara to your top and bottom lashes. Today I’m using Nars Audacious Mascara because that’s what I have open. Feel free to add false lashes if you so choose.
You want to make sure your complexion looks super smooth and flawless- it is Valentine’s Day makeup after all!
Honestly, I’m famous for forgetting to use primer, but I made sure not to skip it for this look. Silicone primers such as E.l.f. Mineral Face Primer are perfect for smoothing our pores, fine lines, and flaky patches. Plus, this one is super inexpensive.
Then, apply your foundation, concealer, and powder as normal.
I used my ultimate favorite foundation, Too Faced Born This Way Foundation in Warm Nude, along with my E.l.f. HD Lifting Concealer in Fair.
Softly contour your face
Lightly dust a contouring shade that is one or two shades deeper than your skin tone in the hollows of your cheeks, down the sides of your nose, and anywhere else you like to contour.
I wanted a very soft contour that wouldn’t leave me looking too harsh, or too bronzed. The Wet n Wild Contour Palette in Dulce De Leche is awesome because the contour shade isn’t too dark, and it has a slightly rosy undertone the gives a pretty, I’m-a-real-life-Instagram-filter kind of effect.
I just used the matte highlighting shade from this palette to set my undereye concealer, but feel free to use whatever powder you normally do.
Sweep on a pinky blush
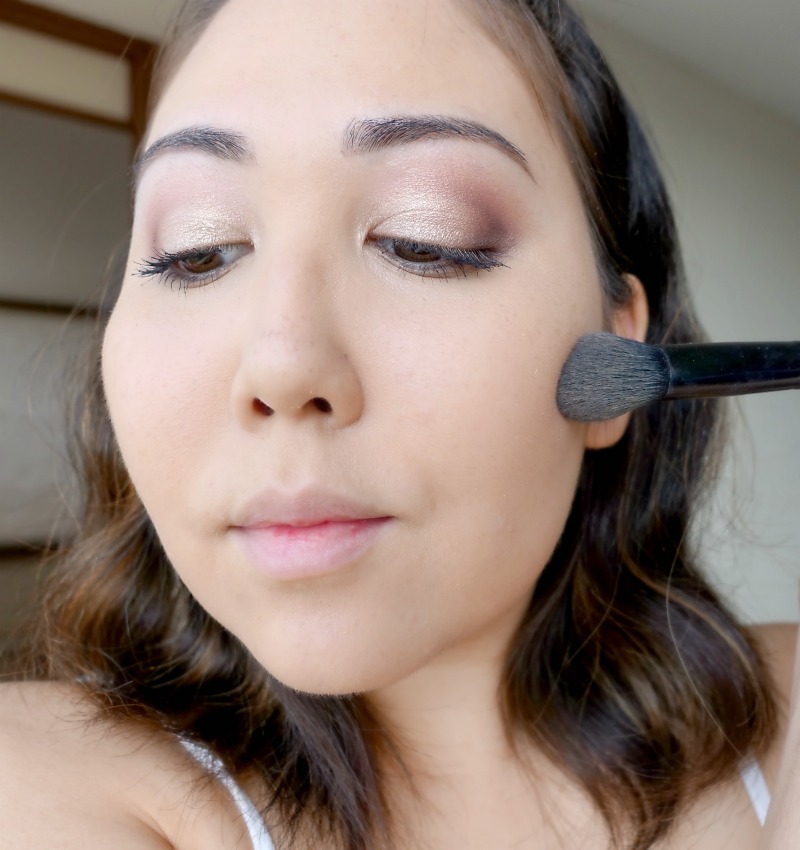
Select a cool, pinky blush to match with the pink Valentine’s Day makeup theme. Apply to the cheeks using a fluffy brush. Start off lightly, and then build up the color so that it’s perhaps slightly rosier than you’d normally wear.
I’m wearing Milani Baked Blush in Delizioso Pink. Using a matte blush gives you so much more versatility because you can control the finished amount of shine much more easily.
Go crazy with highlighter – I did!
I love highlighter, which is why I tend to use matte blushes. See what I mean?
Apply Becca Shimmering Skin Perfector Pressed in Opal on the tops of your cheekbones, down your nose, on the inner corners of your eyes, on your forehead, chin, and cupid’s bow- basically everywhere.
The trick is to not apply too much in any one place. That way, you’ll end up with an all over glow without looking like a fresh-out-of-the-fryer chicken wing.
Prep your lips & apply red liquid lipstick
Exfoliate your lips with a toothbrush or sugar scrub and apply lip balm prior to starting this Valentine’s Day makeup look. When it’s time to slap on your lipstick, your lips will be soft and ready to go.
Wipe off any excess lip balm and apply one coat of red liquid lipstick. I’m using Ciate London Liquid Velvet in Diva. It’s a bright shade of red with strawberry-pink undertones, and it’s perfect for the look I’m going for.
If necessary, define the edges with a lip brush to get a clean line. Wait for the lipstick to dry, and you’re done!
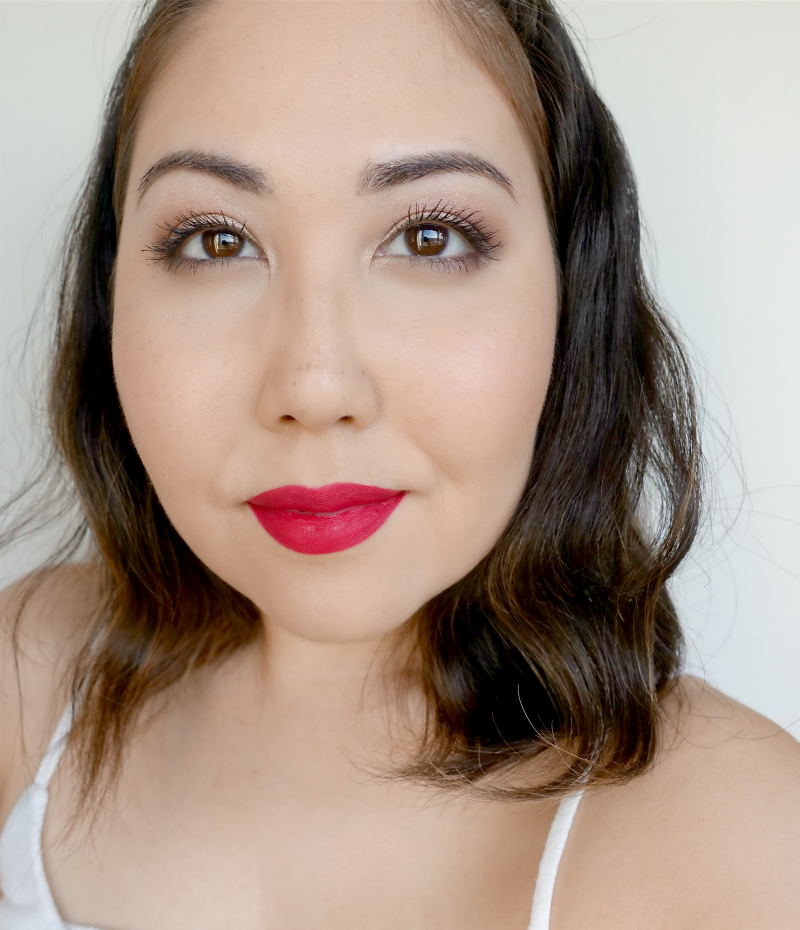
Try this look out for yourself!
All of the products I used are linked above, but you can totally swap out anything I used for your favorite products. That’s the beauty of makeup- there are no rules!
Have fun and have a wonderful Valentine’s Day.
That’s all for today!
Like this Valentine’s Day makeup look? You’ll probably enjoy this tutorial too >> Pretty & Blustery Everyday Winter Makeup Tutorial
If you find this post interesting, informative, or just plain entertaining, tell me about it in the comments below! And don’t forget, sharing is caring. Share this post!
Till next time. ♥︎
Sign up for my free monthly e-journal, The Millennial Maven Love Letters for exclusive content + millennial inspiration and lifestyle hacks. Plus get instant access to my library of on-the-go style downloads!
FTC- Not sponsored by any brands mentioned. I purchase all products myself. All opinions are my own. Some links may be affiliated.
Such a beautiful look. I’d probably wear something like this year round, lol. Your tutorials are so great. Keep em coming!
Thanks you so much, Jona! I will definitely keep the tutorials coming regularly. If you want, you can sign up for my weekly email newsletter so you never miss a tutorial, or any other post! Sign up here >> Sign up!
Thanks for reading! 🙂 xo