This post contains affiliate links. To learn more, hop over to our Disclosure page.
It’s travel month on The Millennial Maven! And I’m on a minimalist makeup kick.
When I travel, I travel light. Super light.
You will never catch me pulling out my credit card to pay for a checked bag. Nor will you find me impatiently fidgeting waiting for my suitcase at the luggage carousel. Nope, while everybody else lingers, I’m already speeding away from the terminal.
I have tons of tips for how I keep my packing ultra streamlined, but today, we’re focusing just on the makeup.
We all love makeup around here, but traveling with your entire collection is just impractical. But you’re definitely not okay with having absolutely no options for different looks.
This kit offers everything you need for natural and full face makeup looks, which makes it perfect for on the go!
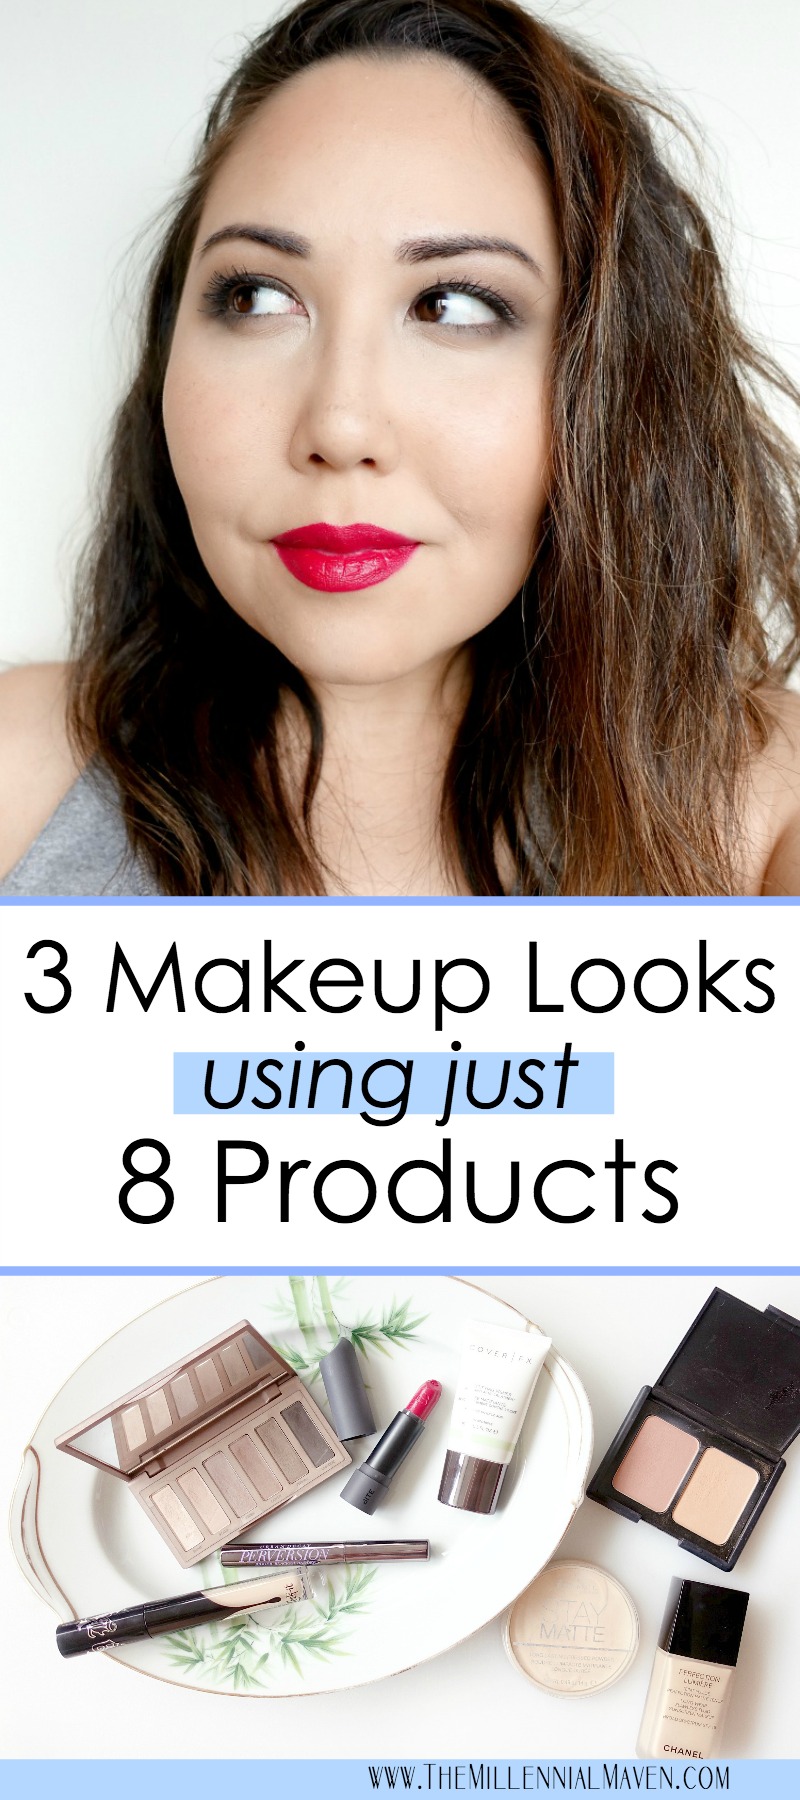
You will need…
Face primer >> Even though this doesn’t add “color” to your face, don’t skip it! Primer helps the your makeup stand up to whatever you throw at it, whether that means all day exploring, or all day hustling.
I like: Cover FX Mattifying Primer with Anti-Acne Treatment
Medium coverage foundation >> Select a medium to buildable foundation that can be sheered out for more natural looks, but also provides fuller coverage when you want or need it.
I like: Chanel Perfection Lumiere Foundation >> Discontinued
Full coverage concealer >> Make sure you have all the coverage you need with a full-coverage concealer that you can use sparingly, or all over the place!
I like: Kat Von D Lock It Concealer
Translucent pressed powder >> Especially important if you have oily skin, but this is also super helpful for blending your eye looks without using tons of different colors.
I like: Rimmel Stay Matte Pressed Powder in Transparent
Natural/Nude blush >> A natural matte blush duo with two shades of nude is ideal. A slightly darker shade can be used for light bronzing, and a lighter shade for adding a peachy flush to your cheeks.
I like: E.l.f. Cosmetics Matte Blush Duo in Soft & Subtle
Nude eyeshadow palette with shimmers & matte shades >> Go for a cool toned palette that can also be used for contouring.
I like: Urban Decay Naked2 Basics Eyeshadow Palette
Black mascara >> Choose one that you know doesn’t smudge or flake, and you’ll get much more use out of it than just on your lashes.
I like: Urban Decay Perversion Mascara
Creamy red lipstick >> Look for a super opaque, moisturizing, and creamy formula (no shimmer or metallic finishes) for the most versatile wear.
I like: Bite Beauty Amuse Bouche Lipstick in Sour Cherry
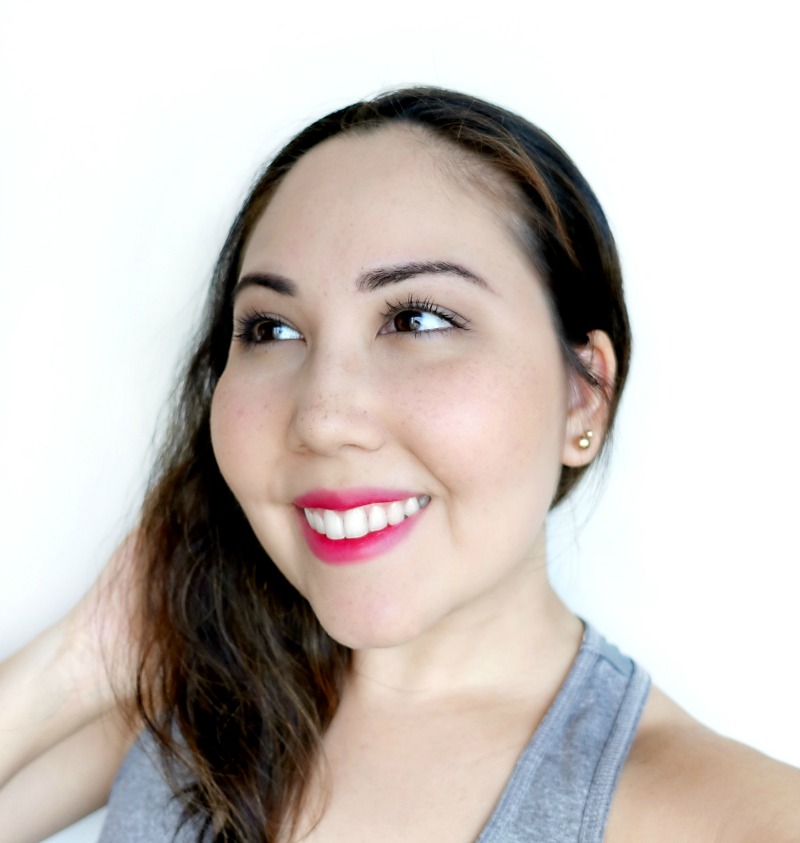
Look #1 – Natural & pretty
A perfect everyday look that’s minimal and natural, but still put together.
Eyes >>
I go super light on the eyes because I definitely don’t want them looking out of place, you know what I mean? (Of course you do 😉
But first, brows! For a natural look, I use PRIMAL from my Urban Decay Naked2 Basics Palette to lightly fill in my brows. It’s a barely there shadow, but it works to extend the length of my brows, and give them a bit more shape.
Using a fluffy eye brush, dust a thin layer of either STARK or FRISK from the Urban Decay Naked2 Basics palette over your entire eyelid area. Then, add one or two light coats of mascara to your lashes, and that’s it!
Face >>
If there’s one thing I’ve learned, it’s to never skip primer! I always use an oil-controlling primer on my t-zone, but you can use whatever primer works best for your skin type. The main things are to help neutralize your skin’s underlying issues, and give the foundation something to cling to.
My cheeks are rather rosy, so I like adding a tiny bit of coverage just to even everything out. I apply a medium coverage foundation and blend it in with my fingers. This sheers out the coverage and makes sure it doesn’t look too heavy.
Add a bit of a peach blush, (I’m using this one from E.l.f.) on your cheeks, on your nose, and anywhere else you want a light flush of color.
Lips >>
The great thing about a super creamy and pigmented lipstick is the sheer number of ways you can wear it. The red lipstick I have here sheers out to a pretty, bright pinkish shade that’s perfect for that summertime “popsicle stained” lips look.
Apply the lipstick straight from the tube onto the inner rim of your lips. Then, use your finger to blend the color out toward the edges of your lips. Don’t worry about creating a razor sharp lip line.
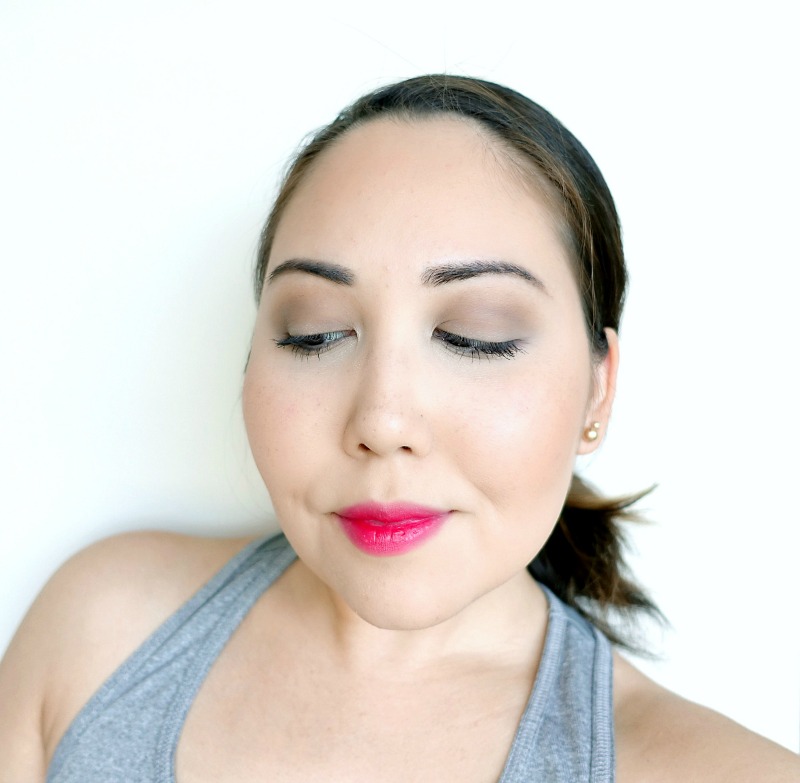
Look #2 – A bit more
Still everyday appropriate, but offers slightly more coverage and color. Perfect for work or important daytime errands.
Eyes >>
I like adding a second eyeshadow color into my crease for a bit more drama. I layer COVER all over my eyelids, and then blend PRIMAL into the outer crease. To balance the look, I sweep COVER under my lower lash line for a bit of eyeliner-less definition. Finish the eyes with two coats of black mascara.
For the brows, I use PRIMAL again on a small angled brush. But this time, I add a small amount of UNDONE to the bottom edge and tail for slightly more definition.
Face >>
I prime my face, (of course,) and then I apply the same foundation using a dampened Beauty Blender. The moist sponge adds slightly more coverage than using my fingers, but it doesn’t end up looking heavy by any means.
Next, I add a touch of concealer under my eyes and blend with the same sponge. My goal here is to just neutralize any darkness, not add a blaring highlight. Still trying to keep this as natural as possible.
Since I’m wearing more face products, I like setting everything with a mattifying powder. Rimmel is my long-standing favorite.
Finally, I add definition and color back to my face with the bronzy shade from my e.l.f. blush duo. I put that basically anywhere I’d use bronzer. Then I pop a touch of the peachy blush on the apples of my cheeks for extra blendiness.
Lips >>
Nothing really different to this look from the last one. All I do is add slightly more color, but I blend it the same way. Easy.
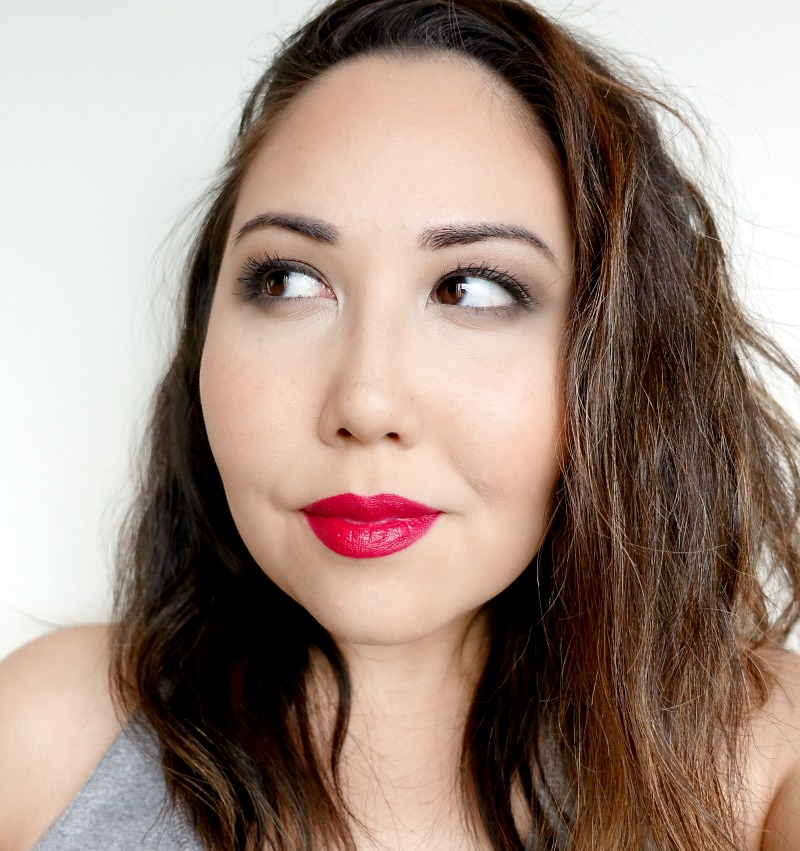
Look 3# – Full glam
Transform your daytime look into a perfect going out face, complete with sexy messy hair! (Just kidding about that last part.)
This look is totally customizable! Want it darker than I have shown here? Go for it. Just add more eyeshadow.
Eyes >>
I left my eyebrows about the same as with the last look, but if you love bold brows, this is your chance to showcase them! If you have dark eyebrows like me, try adding more of UNDONE to the edges, and blend in PRIMAL toward the front of the brow for a pretty ombré brow look.
Create a basic smoky look by applying PRIMAL or UNDONE all over your eyelid (I went with PRIMAL) and drag it down beneath your lower lash line. Keep layering until the color is as deep as you like. Then, pick up COVER on a fluffy brush to blend out the edges. If you need some extra help in the blending department, try adding FRISK or STARK around the edges.
Now, we’re getting crafty with the mascara. Pick up a small amount of mascara on a small eyeliner brush and drag it along your upper lash line. It looks just like a gel eyeliner. You could even do a wing if you want! Just make sure the mascara you’re using doesn’t flake, and you’ll be good to go!
And of course, add a couple coats of your mascara onto your lashes too.
Face >>
I like a full coverage face for my glam looks, and for that I find applying my foundation with a brush works best.
I definitely go heavier on the concealer this time around for some more dramatic highlights and definition. Apply your concealer in the ever-popular triangle shape under your eyes, a strip down the nose, and few dabs on your forehead, chin, and smile lines.
Set everything with powder. Super important.
Highlighting and contouring are like two peas in a pod- life is incomplete without one or the other. Since I highlighted, now I need to contour. I use the my PRIMAL eyeshadow with a small brush to place some shadows just under my cheekbones and down the sides of my nose.
Pick up the bronzy blush shade on a fluffy face brush to blend in your contour and add color all over the rest of your face.
Feeling extra? Dab your finger lightly on the tip of your red lipstick and tap it onto your cheeks, making sure to blend well. A little bit of rosiness never hurt anyone!
Pssst! Want to see more about how I achieve a flawlessly highlighted look all the time? Check out this post all about my highlighting routine >> How to Highlight Your Face the RIGHT Way (+ the wrong way)
For a final touch, dust SKIMP from your UD eyeshadow palette on the tops of your cheekbones for a subtle and glowy highlight.
Lips >>
It’s finally time for that gorgeous lipstick to show us what it can do!
Apply a full layer of your lipstick for a totally opaque look. For extra precision, go over the edges with a clean eyeliner brush to smooth out any bumps or fuzziness in your lip line.
Gorgeous.
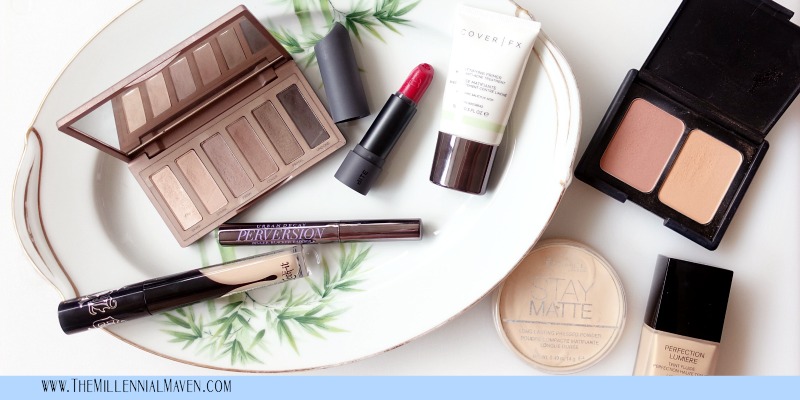
Here are those products again!
Cover FX Mattifying Primer with Anti-Acne Treatment >> [Sephora]
Chanel Perfection Lumiere Foundation >> Discontinued
Kat Von D Lock It Concealer >> [Sephora]
Rimmel Stay Matte Pressed Powder in Transparent >> [Amazon] [Ulta]
E.l.f. Cosmetics Matte Blush Duo in Soft & Subtle >> [E.l.f. Cosmetics]
Urban Decay Naked2 Basics Eyeshadow Palette >> [Sephora] [Ulta]
Urban Decay Perversion Mascara >> [Sephora] [Ulta]
Bite Beauty Amuse Bouche Lipstick in Sour Cherry >> [Sephora]
That’s all for today!
Like this post? You’ll definitely want to check this one out too >> How to Create 6 Eyeshadow Looks Using Only 3 Basic Eyeshadows
If you find this post interesting, informative, or just plain entertaining, tell me about it in the comments below! And don’t forget, sharing is caring. Share this post!
Till next time. ♥︎
Sign up for my free monthly e-journal, The Millennial Maven Love Letters for exclusive content + millennial inspiration and lifestyle hacks. Plus get instant access to my library of on-the-go style downloads!
FTC- Not sponsored by any brands mentioned. I purchase all products myself. All opinions are my own. Some links may be affiliated.
Leave a Reply