This post is not sponsored, but does contain affiliate links. To learn more, hop over to our Disclosure page.
I’ve got a spring in my step! It’s another fall makeup tutorial, because I just can’t get enough.
The last fall makeup look I created used deep green and gray to create a smoky eye fit for nights out or gloomy days around town. If you haven’t checked that out, see it right here >> Smoky Green & Gray Fall Makeup Look (Fall Makeup Tutorial)
For this look, I’m taking a color palette normally reserved for spring and “fall-ifying” it. It was love at first sight (and smell) when I first met the new Too Faced Just Peachy Matte palette. I just had to create a look using the gorgeous shades!
It’s the epitome of versatile for day or night, and I can’t wait to share my favorite new fall look with you. Let’s get started!
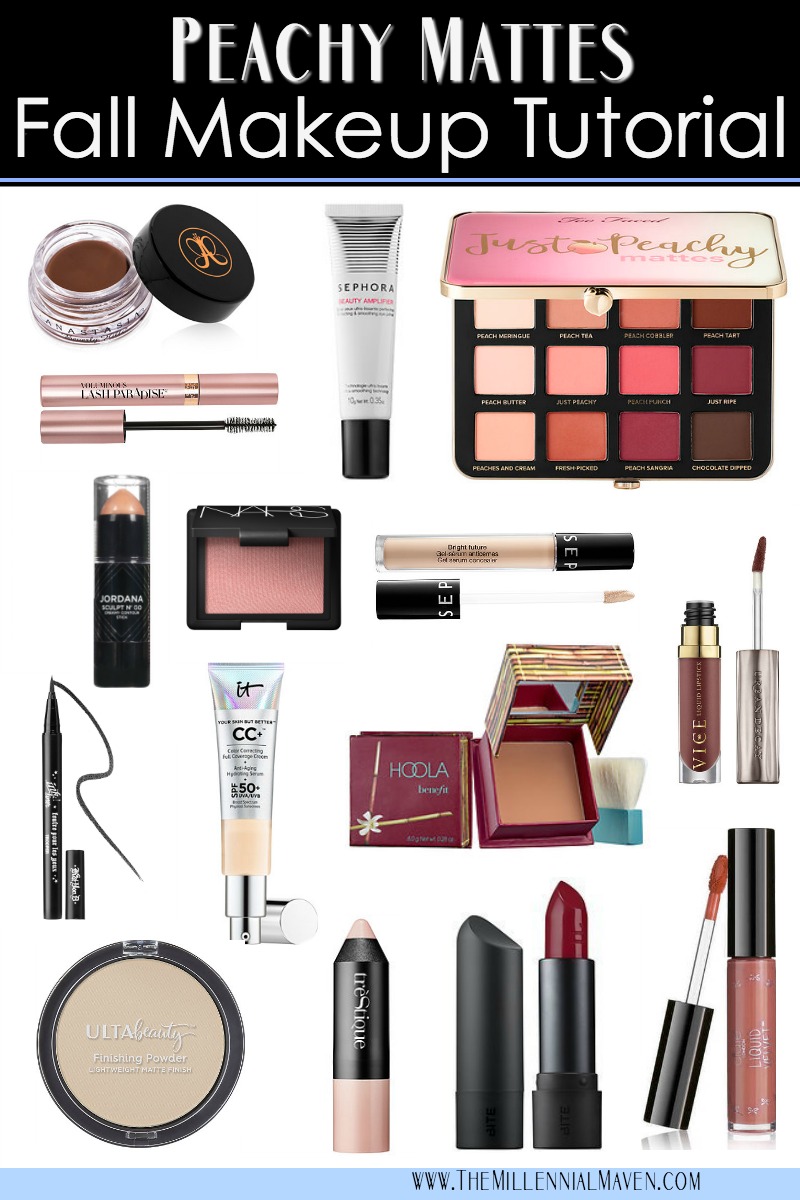
These are the products I’m using
Anastasia Beverly Hills Dipbrow in Dark Brown >> [SEPHORA] [ULTA]
Sephora Collection Beauty Amplifier Perfecting & Smoothing Eye Primer >> [SEPHORA]
Too Faced Just Peachy Velvet Matte Eye Shadow Palette >> [SEPHORA]
Kat Von D Tattoo Liner in Trooper >> [SEPHORA]
L’Oréal Voluminous Lash Paradise Mascara >> [ULTA]
It Cosmetics Your Skin But Better CC Cream with SPF 50+ >> [SEPHORA] [ULTA]
Sephora Collection Bright Future Gel Serum Concealer >> [SEPHORA]
Jordana Sculpt N’ Go Creamy Contour Stick >> [WALGREENS] [AMAZON]
Ulta Finishing Powder in Translucent >> [ULTA]
Benefit Cosmetics Hoola Matte Bronzer >> [SEPHORA] [ULTA]
Nars Blush in Orgasm >> [SEPHORA] [ULTA]
trèStique Highlight & Perfect Stick in Maldives Luminescent >> [SEPHORA]
Bite Beauty Amuse Bouche Lipstick in Sour Cherry >> [SEPHORA]
Urban Decay Vice Liquid Lipstick in Amulet >> [SEPHORA] [ULTA]
Ciaté London Liquid Velvet Moisturizing Matte Liquid Lipstick in Swoon >> [SEPHORA]
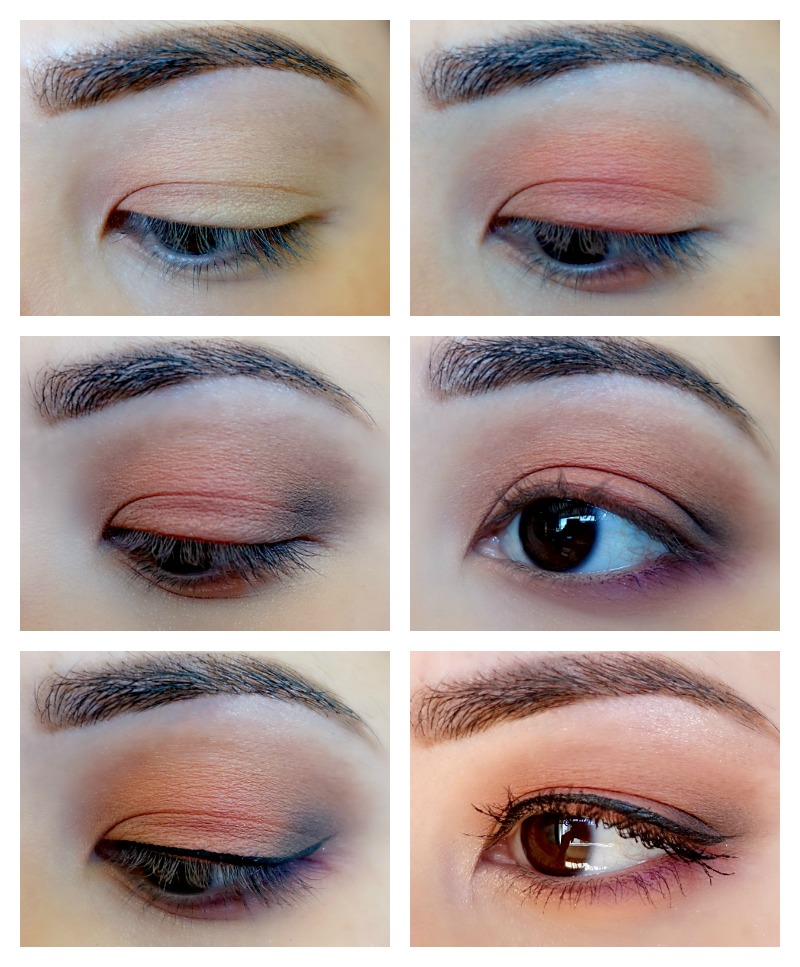
Let’s start with the eyes
Brows & eyeshadow primer // As always, fill in those eyebrows to perfection. Now is the time to draw, erase, draw again, and fiddle with the shape and length. Just like building a house, getting the framing right is super important. I find ABH Dipbrow perfect for this. When you’re satisfied, pop your favorite eyeshadow primer all over your eyelids. I’m using Sephora Collection Eye Primer today.
Step 1 // Grab a fluffy crease brush and set your eyeshadow primer with PEACH MERINGUE. We want this look to be super bellowy and soft, almost like a peachy puff of smoke on your eyes. Using the same fluffy brush, pick up PEACHES AND CREAM and fluff that onto the inner third of your eyelids.
Step 2 // Still using the same brush, dip into PEACH COBBLER and gently dab that onto the center third of your eyelids. Extend the color right up to your crease if you have visible eyelids. If your eyelids aren’t visible with your eyes open, continue blending the color upward until it is visible with your eyes open.
Step 3 // Dip (pun intended) gently into CHOCOLATE DIPPED and fluff the color onto the outer third of your eyelids. You have tons of freedom here. Blend the color in a rounded shape following the curve of your eyelid for a natural look. Add more drama by extended the smokiness outward in a wispy wing shape like I’m doing.
Step 4 // Clean off your brush as much as possible. You can use a brush cleaning spray, but I find that simply wiping the brush off on a tissue until you no longer see color coming off works just fine. Pick up the teeniest amount of PEACH COBBLER and use that to blend over your crease. If the color gets too deep for your liking, simply use a light cream shadow to tone it down. Go back and forth between the colors as necessary.
Step 5 // Line your upper lash line using Kat Von D Tattoo Liner in Trooper. Add a small flick for a little something extra, but I like to ensure I keep it quite subtle.
Now, let’s take a break from the eyes and work on the face makeup! When you’re done with your face, come back and pick up on Step 6.
Step 6 // I like a bit of smokiness and color on my lower lash line. Blend JUST RIPE onto the outer half of your eyes using a small pencil brush. Then, go over your entire lower lash line using PEACH COBBLER on whatever brush you feel comfortable with. Don’t be afraid to blend the color downward a bit. If it’s well blended, you won’t look like a raccoon!
Finishing touches // For a cohesive look, apply the same highlighter to your brow bone and inner corners that you use on your cheekbones. Just take a little bit on your finger and dab it lightly on your brow bone. Highlight your inner corners straight from the stick.
Apply your favorite mascara to your top and bottom lashes, and add false lashes if desired. False lashes really elevate your look for evening, but they’re not necessary for everyday wear.
My perfect fall face routine
A lightweight base // As much as I like to believe the weather is cooling down, reality is that Hawaii weather has a mind of its own. I still enjoy a lightweight base that’s comfortable, though I like a bit more coverage just for a change from summer. It Cosmetics Your Skin But Better CC Cream provides a great medium-ish coverage, and it’s quite buildable.
Add a thin gel concealer to brighten your under eyes without giving your face a completely masked effect.
Sculpt // Highlight your face using the same concealer. Place a few dots just above the center of your brows, down your nose, and wherever else you enjoy highlighting. Drag Jordana Sculpt N’ Go starting from just above your ear, and down toward your mouth, stopping halfway. Blend everything in using a damp sponge, starting with the highlighted areas.
Set // Apply a lightweight finishing powder all over to set your makeup so it stays in place all day. Recently, I’ve been loving my Ulta Translucent Finishing Powder. Sweep on a teeny amount of Benefit Hoola Bronzer over your contoured areas to redefine and add some warmth back into your face after powdering. This step really makes all the difference.
Blush & highlight // Nars Orgasm blush is perfectly peachy and shimmery, and it complements the matte peach eyes perfectly. Dust the blush on the apples of your cheeks and blend backward toward your temples.
Finally, rub your highlighting stick on your hand to warm up the product, and apply using your fingers. I wouldn’t recommend applying directly to the skin, as it can mess up your foundation underneath.
Three options for lips
Stand out red // Bite Beauty Amuse Bouche Lipstick in Sour Cherry is the perfect neutral red that complements many different skin tones. One of my favorite lipstick formulas of all time. This is perfect for evenings out, or just rocking your day like a boss.
Muted & mysterious // For a long lasting lip color that means business, try Urban Decay Vice Liquid Lipstick in Amulet. This shade is fall, and boardroom approved!
Soft & natural // If you’re not feeling those deeper colors, a peachy nude matches perfectly with this look. Ciaté London makes my favorite shade Swoon.
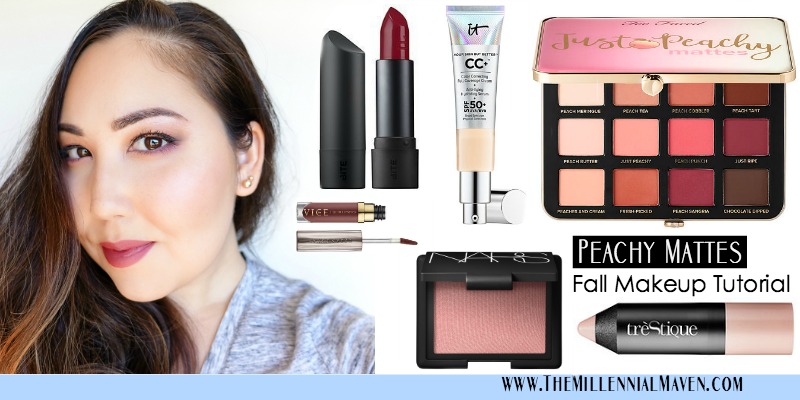
That’s all for today!
Like this post? You’ll love this one too >> Smoky Green & Gray Fall Makeup Look (Fall Makeup Tutorial)
If you find this post interesting, informative, or just plain entertaining, tell me about it in the comments below! And don’t forget, sharing is caring. Share this post!
Till next time. ♥︎
Sign up for my free monthly e-journal, The Millennial Maven Love Letters for exclusive content + millennial inspiration and lifestyle hacks. Plus get instant access to my library of on-the-go style downloads!
FTC- Not sponsored by any brands mentioned. I purchase most products myself. All opinions are my own. Some links may be affiliated. Jordana contour stick provided by Jordana for a previous post.

Leave a Reply